Blog Categories
Web design Branding Blogging Social Media Inbound All
We post weekly tips, tricks, and marketing advice to help grow your business.

How To Start A Newsletter
A newsletter is a great way to stay in front of your clients, fans, and followers. Whether you’re running a special promotion or have a few new blog posts you’d like to share, a newsletter is the perfect vehicle to recap all the latest and greatest things you have going on in your business. In today’s post, we’re going to walk you through the basics of starting a newsletter.

A newsletter is a great way to stay in front of your clients, fans, and followers. Whether you’re running a special promotion or have a few new blog posts you’d like to share, a newsletter is the perfect vehicle to recap all the latest and greatest things you have going on in your business. In today’s post, we’re going to walk you through the basics of starting a newsletter.
Decide on a schedule.
If you want to start a newsletter for your small business, you’ll have to commit to being consistent. Just like with a blog, once you send out your first newsletter, your audience is going to expect to regularly hear from you. Don’t let them down by being inconsistent. Devise your game plan up front and create a publishing schedule that you can reasonably manage. Once per month. Once per week. Whatever it is, just be sure you can adhere to it.
Plan your content ahead of time.
There’s nothing worse than scrambling to throw together content at the last second. If you’re going to commit to running a newsletter, you’ll have to organize your content and plan ahead. If you’re publishing a monthly newsletter, you should develop your topics and content a month in advance. Look at what you’ll be posting on social media and your blog and flesh out the substance of your upcoming newsletter from there.
Pick a platform.
Ok, let’s talk tech. There are many different email platforms available out there. And quite frankly, you should use whatever one you’re most comfortable with. However, some things you might want to look for in an emailing software are:
Responsive templates
Design flexibility
Ability to segment your contacts
Opt-out management
Automation
Reporting tools
Customer support
Familiarize yourself with your email software.
Make sure you’re completely comfortable using all aspects of whatever email software you decide upon. Play around with it ahead of time and tinker around with the design tools. You definitely won’t want to be fumbling around on the day your newsletter is supposed to launch. Outside of actually designing the newsletter, you’ll want to know how to create your email distribution lists and then how to analyze the results at the end of each campaign.

Feeling frantic is fun…
Said no one ever.
Create a buzz.
Prior to launching your newsletter, it will be important to drum up some excitement about it and start building your list of subscribers. Consider running a marketing campaign two to four weeks before publishing your first newsletter. Let your fans know what kind of content you’ll be sharing and why they should subscribe. This is key! People get more than enough junk mail and they certainly aren’t looking for more. Make sure you clearly communicate all of the benefits of opting in to your newsletter.
Make it easy to subscribe.
Actively promoting your newsletter will be the key to growing your subscriber base. We recommend setting up a landing page on your website where people can go to subscribe. Anytime you advertise your newsletter, you should link to this page. The landing page should also reiterate all of the benefits people will enjoy by subscribing to your newsletter. Again, get them excited about hearing from you! Aside from talking about your newsletter on social media, you can drop a few subtle hints about it by including a subscription box in the footer of your website and including a subscription link in your email signature as well.
Know where to go for graphics.
Quality newsletters not only sound great, but look great, too. As you’re planning out your content, think about what images your can pair with the various topics you’ll be writing about. If you plan on taking photos yourself, make sure they’re high quality. There’s nothing wrong with using photos taken on your iPhone IF they look professional. Don’t ever use blurry or low resolution images in your newsletter. If you take photos yourself, make sure the lighting is optimal and follow the rule of thirds. (For more tips on taking amazing photos using an iPhone, read this blog post.)
If you’re looking for stock imagery, we’ve got you covered. Check out the sites below. They’re a few of our personal favorites for beautiful stock photography.
Pixabay
Pexels
Unsplash
Adobe
Creative Market
Important note about photos! Be sure to keep the photos you use in your newsletter under 500KB a piece. Large file sizes will load slowly and make for a less than desirable reader experience!
By planning ahead, you’ll set yourself up for success with your small business newsletter. Remember, the key is consistency. Dedicate time and energy to consistently publishing great content and watch those subscriber numbers GROW!
Download our FREE Website Planner!
It’s the ultimate workbook to help you organize everything you’ll need for creating an awesome website.


How To Explore And Download Google Fonts
One way to really differentiate your marketing for your small business is to experiment with different fonts. Times New Roman, Arial, Garamond … those are the same old, same old. Everyone uses those. Did you know that Google offers over 900 font families that you can download and use for free? In this blog post, I’m going to teach you how to do this.

One way to really differentiate your marketing for your small business is to experiment with different fonts. Times New Roman, Arial, Garamond … those are the same old, same old. Everyone uses those. Did you know that Google offers over 900 font families that you can download and use for free? In this blog post, I’m going to teach you how to do this.
Why I love Google fonts so much.
Ok, so there are two reasons why Google fonts are completely awesome. First off, every font family in the massive library of fonts is open-source. What that means is you can download and use them any way you want … for free! Yipppeeeee!
Aside from the open-source licensing, another reason I love Google Fonts is because of the variety. The library offers a robust mix of beautiful styles that can be mixed and matched to suit any brand.
Sorting Fonts
Alright, now it’s time to take a trip over to the Google font library!
fonts.google.com
When you hit the Google Fonts main page, it will look something like this.

As you scroll through the page, you’ll realize there’s A LOT to choose from. Thankfully, you’re on a Google website and the search functionality is bar none.
On the right side of the screen, you’ll find a menu of options. This menu allows you to filter the collection based on a number of different criteria:
Categories
Serif:
In typography, a serif is a small line or stroke regularly attached to the end of a larger stroke in a letter or symbol within a particular font or family of fonts. A typeface making use of serifs is called a serif typeface. (Wikipedia) Times New Roman is an example of a serif font.
Sans Serif:
Typeface that doesn’t include the little strokes just mentioned above are referred to as sans serif fonts. Arial is an example of this.
Display:
A display typeface is a typeface that is intended for use at large sizes for headings, rather than for extended passages of body text. (Wikipedia)
Handwriting:
A handwriting font is just what the name suggests … a font that looks like handwriting!
Monospace:
A monospaced font (opposed to a proportional font) is a font whose letters and characters each occupy the same amount of horizontal space. (Wikipedia)

Image from Wikipedia
Sorting
Using the Sorting filter, you can view font families based on what’s currently Trending or the most Popular fonts. You can also filter by Date Added or put the fonts in Alphabetical order.
Languages
The majority of Google fonts are in English but there are font options in several other languages as well.
Sliders
The sliders in the filter menu are very cool. There are sliders for Number of Styles, Thickness, Slant, and Width. By moving the slider to the right on any one of these options, you’ll be presented with fonts that represent more of the particular characteristic you’re filtering. (For example, if you moved the slider all the way to the right on the Thickness option, you’d see the thickest fonts in the library.)
A Note about Number of Styles:
Some fonts are offered in varying styles. For example, the font Arima Madurai is offered in eight different styles ranging from Thin all the way to Black. Depending on how you’ll be using a font, you may want to consider downloading multiple different versions of it.

Choosing Fonts
The Google font library, even with its amazing filtering capabilities, can be a tad overwhelming. How does one choose a font with all of these incredible options?! Well, my advice is to explore the library and click on the fonts that speak most to you (and, of course, speak to your small business brand). I personally have a thing for sans serif and handwriting style fonts. 🤓
If you click on a font that you like, you’ll be brought to a details screen, which looks like this:

In this example, I had clicked on the font called Satisfy. The details screen shows all of the characters in the collection and even lets you type in sample text so you can see what different words or phrases will look like written in the font!
To view sample text, simply click where it says “Click here to preview text.” (This is found in the middle of the page underneath Styles.)
After you type your text, you can use the red slider to change the size of it. In my example, I bumped the point size up to 90 so I could see what my text would look like as a big headline. 🍍😊

On the left side of the screen, you’ll see a menu of fonts that will pair nicely with the font you’ve selected. By clicking on any one of these options, the paragraph text to the right of it will change to that particular font. It’s a great way to see how other fonts will coordinate with your selected font … which helps narrow your search, too!

How To Download Fonts
Once you’ve selected a font that you like, you can go ahead and add it to your collection to download! To do this, simply click the little red plus icon. (It will be at the upper right corner of the details page or to the right of each font listed on the main page.)
Each time you select a font, it will be added to your collection. The collection will remain in an expandable box at the bottom right of the page as long as you have fonts selected. To access your collection, click the minus sign on this expandable box.
When you expand the collection, it will look something like this:

To download the font(s) in your collection, simply click the icon that looks like a down arrow with a horizontal line underneath it (it’s in the top right corner of the box). A zipped folder will then be downloaded to your computer.
If you’re on a Mac, you can double click the zipped folder to unzip it. Then open the unzipped folder and double click the font file. This will trigger your Font Book to open. Click Install Font and BOOM! The font is installed and ready for you to use!
Happy font browsing! Comment below and let me know what you download. :)
Need a small business brand identity?


How To Write Social Media Captions For Boudoir Photography
When we realized that our little agency was a hit in this big industry, we soaked it all up. Over the past year, we’ve worked with several boudoir photographers all over the U.S. to help them grow a presence and develop their brand on social media.
So what does social media management for a boudoir photographer look like? Well, in a nutshell, the photographer provides us with a voluptuous gallery of content, gives us creative freedom to use whatever images we think will work best, and attach a caption accordingly. (We also implement a strategy for increasing engagement and growth of the platforms but we’ll leave that wealth of wisdom for a different post.)
In this blog post, I’m going to share how I come up with captions for the boudoir photographer social media accounts that I manage. Here goes!

Ok, it’s no secret that marketing for boudoir photographers is our cup of tea. 😏Our passion for the industry is derived from our appreciation of the female form. We’re all about encouraging positive body image. I myself have participated in several boudoir shoots … and I know first-hand what the experience can do for the self-esteem. (Read about my very first shoot here!)
When we realized that our little agency was a hit in this big industry, we soaked it all up. Over the past year, we’ve worked with several boudoir photographers all over the U.S. to help them grow a presence and develop their brand on social media.
So what does social media management for a boudoir photographer look like? Well, in a nutshell, the photographer provides us with a voluptuous gallery of content, gives us creative freedom to use whatever images we think will work best, and attach a caption accordingly. (We also implement a strategy for increasing engagement and growth of the platforms but we’ll leave that wealth of wisdom for a different post.)
In this blog post, I’m going to share how I come up with captions for the boudoir photographer social media accounts that I manage. Here goes!
Identify your vibe.
All boudoir photographers may share a common theme of nude or almost nude images but that’s pretty much where the similarities end. Boudoir is an art and each photographer has a very different style and vibe. With that said, I never ever EVER use the same captions on different photos from different photographers. To be blunt, it’s lazy and just not how our agency rolls. The captions I come up with are completely based on each photographer’s vibe.
For example, we have boudoir photographer clients who lean toward a soft, whimsical feel. We have clients who showcase an erotic or darker side in their art. Natural … glamorous … dramatic … you name it, I’ve written copy or selected captions for the style! The goal is to always mimic the style of the photographer.
The captions must flow with your style of art. If you specialize in outdoor boudoir and have a gallery full of fantasy or fairytale type images, the captions used on your social media platforms will be very different from a photographer who boasts black leather and red lipstick in their work. Always match the tone of the caption to the style of the work.
Variety is key.
I tend to gravitate toward quotes from poets. However, I’m not a one-trick pony so I like to keep things interesting. I’ll pull in engaging mantras, “10 Ways How To … ,” or ask a question seeking a response. Some days I’ll mix in a “How are you spending your Sunday Funday?” The point is, don’t just slap a Marilyn Monroe quote on every photo and hope for the best. You need to put some thought and energy into your captions. It makes a huge difference and will set you apart.
Also, the tone of your captioning should somewhat represent you as a photographer. Some of my clients are very open to blunt and sexually charged captions. It fits their personality and style as a photographer. I also have clients who are much more reserved or discreet. In these cases, I take a softer approach.
Keep in mind the region where you’re located, too! A photographer in the New York City area may have a more open-minded audience than perhaps a photographer in a Bible Belt state. Caption your photos so they speak to the audience you’re primarily serving.
Hashtags are life.
I mean, sometimes I view them as a necessary evil but you catch my drift. Using appropriate and geographical hashtags is a giant deal. Hashtagging “#boudoir,” “#boudoirphotography,” “#boudoirinspiration,” etc. is fine ... and it won’t hurt anything ... but broad hashtags are probably not going to help you a whole heck of a lot.
Who is your target audience (or buyer persona)? Is she a young mom in her 30’s? Do some research on popular hashtags for moms in your area. Or maybe your ideal client is a woman in her 50’s or 60’s who is a high-level executive. Take a gander at female career-focused hashtags in your region.
For more on crafting a detailed client persona, use our go-to tool: HubSpot’s Make My Persona Tool!
Lastly, don’t machine gun hashtag. It looks cheap and serves no purpose. Use relevant hashtags that have an actual following (who just so happens to match your ideal client persona).
Proofread your copy!
The death of all credibility can be attributed to poor grammar and punctuation. Seems silly and ridiculously simple but it’s legit ... and extremely important.
If you need a giggle, check out these epic grammatical mistakes made by marketers … shared by our friends at Impact!
Well, there you have it. Easy peasy, lemon squeezy. 🍋(Well, on second thought, maybe it’s not that easy because if it was, everyone would do it ... and we’d be out of a job. 🙀)
Just like your beautiful photography, successful social media management is an art. It’s an honor to be entrusted with the opportunity to share such empowering photos with the world. Follow these tips so you can do so in a way that preserves the authenticity and true beauty of what you see from behind your lens.
Looking for more marketing tips specific to the boudoir photography business? Subscribe to our blog!

How To Make A Mood Board On Pinterest
Mood boards can be incredibly helpful in the website and branding design process. In this blog post, we’re going to explain the benefits of creating a mood board and how you can make one using Pinterest.

Mood boards can be incredibly helpful in the website and branding design process. In this blog post, we’re going to explain the benefits of creating a mood board and how you can make one using Pinterest.
What’s a mood board?
Remember back in the day when you used to make those colorful collages out of magazine clippings? You’d forage your favorite publications for photos, words, or quotes that inspired you and then excitedly glue them to a poster board. Well, that’s the same concept behind a mood board!
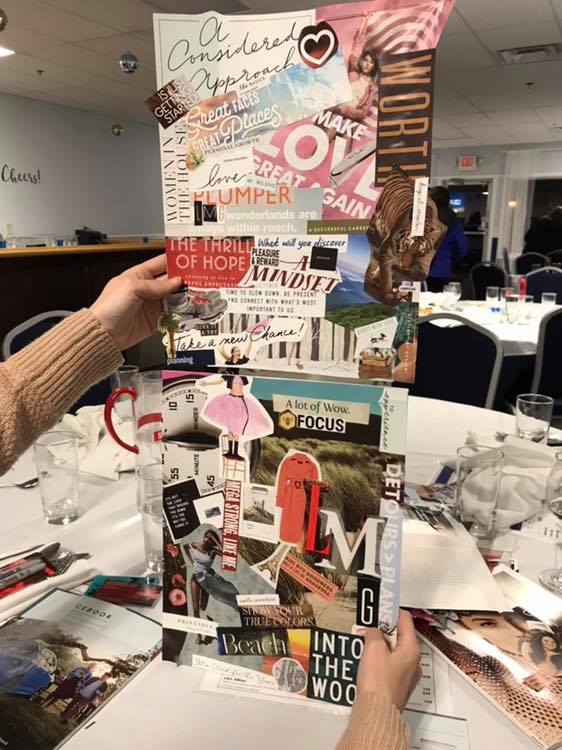
Me and Katie attended a networking event this month and we made old school inspiration boards. How did we do?
When we’re working with a website design or branding client, we have them make a mood board on Pinterest (which, by the way, is much easier than using magazines, scissors, and glue). When searching for images, we ask the client to keep their target buyer persona in mind and choose the things that would inspire them. Remember, when designing a website or brand, it’s more about what your target customer will like than about what you like. (However, if you and your target customer happen to like the same kinds of things, well … that’s even better! It makes creating your mood board a bit easier.)
How To Create A Mood Board For Branding Or Website Design
Step 1:
If you don’t already have one, write a clear and detailed description of your target buyer persona. This step is key! Again, your brand and website needs to resonate with this person. If you need help, we recommend reading HubSpot’s blog post: How to Create Detailed Buyer Personas for Your Business. In it, there’s a free Persona Templates Guide you can download.
Step 2:
If you’re a creative entrepreneur, chances are, you already have a Pinterest account. If you don’t, you’ll need one for this exercise! To do this, go to Pinterest.com and enter:
Your email
A password
Your age

(Note: You can also sign-up using your Facebook or Google account.)
Step 3:
Once you’re logged in, access your profile by clicking on your name in the top right corner of the screen. Then scroll down the page a bit and click on the Boards option that’s underneath your info. If you’re an active Pinterest user, you’ll see all of the boards you’ve already created here. If you’re new to Pinterest, this area will be empty.

Step 4:
Within the Boards section, click the red plus sign to Create Board. In the pop-up box that appears, you can name your board Mood Board (or any other fun name you can come up with). Then click Create.

Step 5:
Now it’s time to fill that board with all the things your target buyer persona would love! When you create a new board, Pinterest will offer up some ideas for it. You can search through those ideas or start typing words in the search bar at the top of the screen. (Note: searching is an easy task when you have a crystal clear description of your target buyer persona!)

As an example, we’re going to show you an actual buyer persona profile (below) so you can make the connection on how the details might affect your search.
Name: Carly
Age: 34
Location: Philadelphia, PA
Relationship/family status: Married (no children)
Pets: Boston Terrier
Education level: Bachelor’s Degree
Occupation: Interior Designer
Annual income: $90,000
Favorite Blog: Design Hunter, Eye Swoon, House of Brinson
Magazines or books: Anything Lisa Scottoline and the latest Pottery Barn catalogue
Hobbies: Sketching rooms/outdoor scenery, yoga, collecting art, and cooking healthy meals
Brands: Pottery Barn, RH, White House Black Market, Hello Fresh
Social media platforms they spend time on: Pinterest, Instagram
TV: Everything HGTV and Food Network
Based on Carly’s profile, here are the search queries we used to fill our board!
Philadelphia
Philadelphia Interior Design
Philadelphia Signage
Fruits
Vegetables
House of Brinson
Pottery Barn
Career Woman Quotes
Scenery Sketches
Artwork
Yoga
The most important part of Step 5 is: Do NOT overthink it! Search terms that are related to your target buyer persona and pin anything that stands out to you!
Here’s the board we came up with for our example buyer persona, Carly …
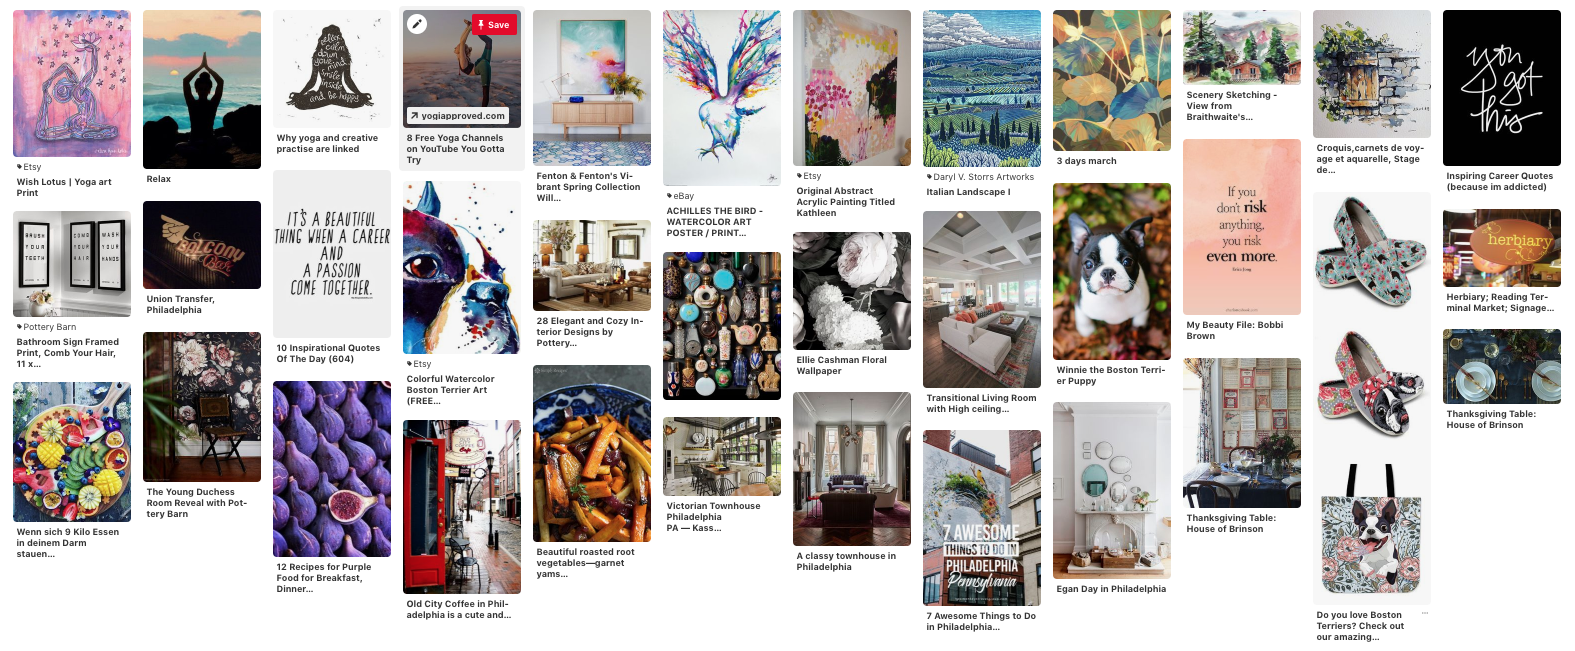
Take a step back and look at your mood board as a whole. Are there any common elements that stand out to you (i.e. colors, patterns, fonts, objects, etc.)? Jot them down because they can be incorporated into your website and/or brand design!
Step 6:
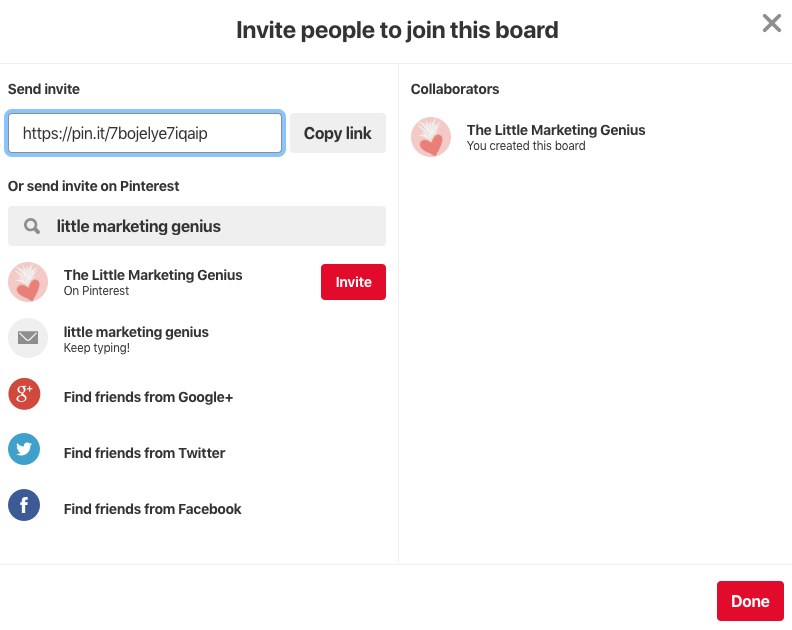
If you purchased a website or brand design package from LMG, you’ll need to share your mood board with us. To do this, go into your board and copy the URL from your web browser. Then, paste that URL in the Mood Board section of your Branding Prep Planner. (If you made your board secret, you can share it with us by clicking the little icon of a person with a plus symbol at the top of your board. Search Little Marketing Genius and then click Invite.)
Mood boards are super fun to create. And by building a board from the perspective of your target buyer persona, you’ll end up with a fantastic visual of what inspires them. Give this exercise a spin and comment below with your findings!
Looking to take your small business to the next level? We can help design a brand your target audience will love! Book a free 15-minute consult with us to get the process started today!

Creating A Small Business Brand From Scratch
One of my favorite types of projects is small business brand design. The creation of something sparkly and new … it’s very, very exciting! If you’re thinking about starting up a new venture or rebranding your current business, then keep reading! In this blog post, I’m going to share the steps I take to create a small business brand from scratch.

One of my favorite types of projects is small business brand design. The creation of something sparkly and new … it’s very, very exciting! If you’re thinking about starting up a new venture or rebranding your current business, then keep reading! In this blog post, I’m going to share the steps I take to create a small business brand from scratch.
Before doing a cannonball into the sea of fun stuff, the very first step in the brand design process is creating your buyer persona(s). Who exactly is it that you’ll be marketing your brand to? This is extremely important because the tone, style, and feel of your brand must … without a doubt ... resonate with that person.
Step 1: Create your buyer persona!
“A buyer persona is a semi-fictional representation of your ideal customer based on market research and real data about your existing customers.” -HubSpot
When creating a target buyer persona for your small business, here are some things you’ll want to identify:
Their name
Their age
Where they live
Their relationship/family status
Their education level
Their occupation
Their annual income
Websites they like / what blogs or YouTube channels they subscribe to
Magazines or books they like to read
Podcasts they listen to
Their hobbies
Brands they like
Social media platforms they spend time on
TV shows they watch
When writing the profile for your persona, it’s important to get as specific as possible. When you’re crystal clear on who it is you’ll be marketing to, the marketing part becomes a whole lot easier!

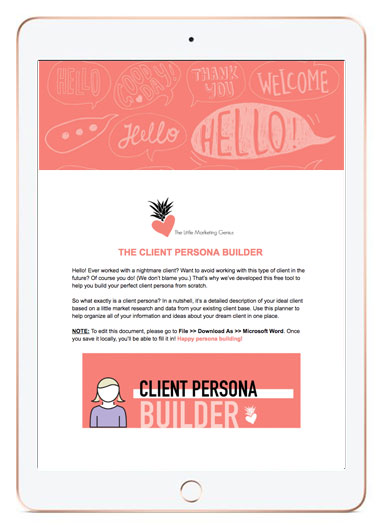
Need help completing this exercise? Download our free client persona builder!
Once you know exactly what your dream client looks like, you’ll never make the mistake of taking on (or marketing to) a nightmare client again. Download our FREE Client Persona Builder tool today.
After your target buyer persona has been developed, read the profile over a couple times. You’ll want to have your character front and center in your thoughts as you move through each of the next phases in the brand design process.
Set The Mood
I begin every small business brand design project with a mood board on Pinterest! Remember back in the day when you used to make those colorful collages out of magazine clippings? You’d forage your favorite publications for photos, words, or quotes that inspired you and then excitedly glue them to a poster board. (Yeah, I deeply miss the days before technology took over everything. 😭) Well, think of a Pinterest board as that old school poster board!
Create a new Pinterest board and, keeping your target buyer persona in mind, start searching for all the inspiring things. It literally doesn’t matter what it is. If you see something that you think would strike a chord with your buyer persona, Pin it to that board, baby! Pin until your little heart’s content.
Pin all the inspiring things!
When you feel like your board is filled with awesomeness, take a step back and look at it as a whole. As you scroll through and relish your Pins, make a list of any themes that stand out to you ...
Colors
Font styles
Objects
Words
Shapes
Etc., etc.
If you see any patterns on your board, be sure to write them down!

Side Story:
I love interior design. All my friends know this and often seek my advice on decorating their homes. A few years ago, my friend Kim was struggling to decorate her townhouse. She would go to Homegoods, for instance, and try to find things that all matched a certain color palette she thought she wanted. When she got the stuff home, she realized that she hated it and would then return everything. It was a vicious cycle.
One day she was sharing her style struggles with me and I gave her this advice:
Just buy the stuff you like and don’t overthink it. It will all come together because it’s your style.
I’m going to give you this same advice for your Pinterest board. Pin all the things you think your buyer persona would like and don’t overthink it. You’ll be amazed at how everything does in fact come together and the unique themes that will be born from it. It worked for Kim and it will work for you, too.
Picking A Color Palette
I freaking LOVE this part of the brand design process! Picking a color palette gives me immense joy … I’m very weird like that. Here’s how I suggest you do it.
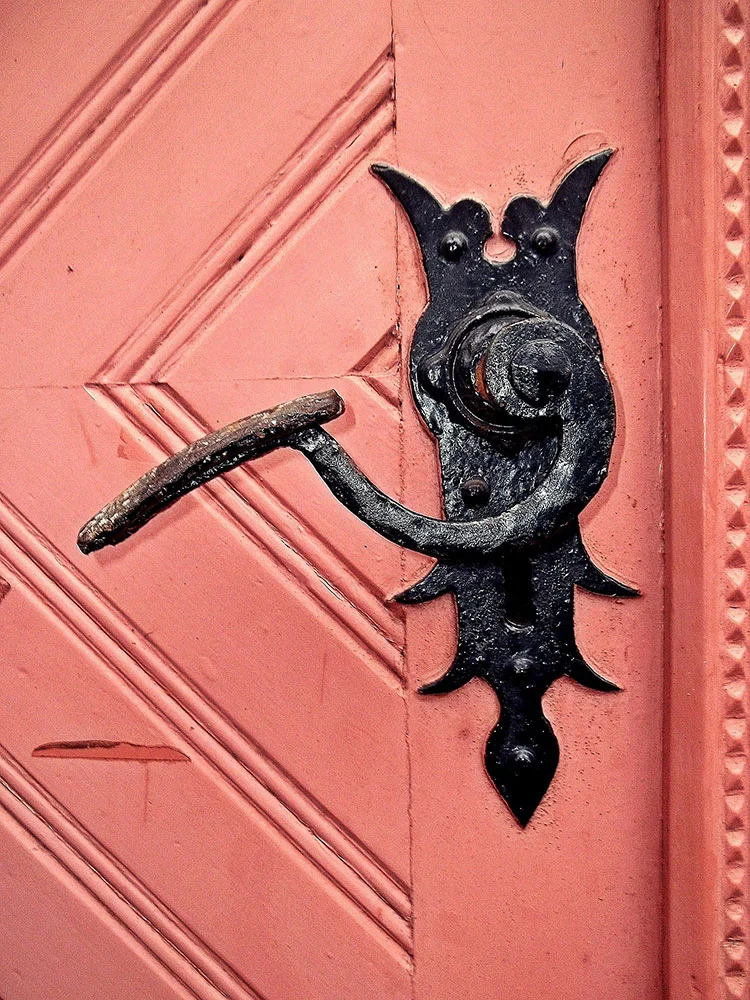
Scroll through your Pinterest board and find one picture that totally stands out to you. A photo that gives you a fantastic vibe when looking at it. Save the photo on your computer and then head on over to the HTML Color Codes website.

Click the blue Upload File button and upload the inspirational image you just saved. As you hover your mouse over different areas of the photo, you’ll see the swatch in the upper right section of the box start to change.
In my example, I want to choose an orangey-pink hue from that beautiful bouquet.

Click on a color you like and, voilà! You’ll see the HTML color code for it appear in the lower right section of the box. If you see a hue within the color swatch that you also like, you can click directly on it to get the code.


Go through your image and select five or six colors from it. Be sure to jot down the HTML color codes for each.
(Pro Tip: I like to type my codes into a Note so I can easily copy and paste them when needed.)
Here are the colors I picked from my photo:
#FB4448
#D0C6E1
#EBE1DF
#179151
Next, go to Canva.com. Canva is a free online tool for creating graphics. If you don’t already have an account, you’ll need to set one up. I use the free version of Canva all the time and highly recommend it! (There’s a paid version that offers more features if you’re interested!)
Once you’re in Canva, click the Create A Design Button and then choose Instagram Post. We’re going to make 1080x1080 pixel swatches of the colors we picked out of our inspiration photo! To do this, click the Elements button on the left side menu and then type Square into the search box. Click on any solid (Free) square image that you want.


The image you choose will appear in the white box. Resize the square so it fills the entire white space. Then click the little square color swatch that is sitting above it. A menu will open and you’ll want to hit the + option. This will allow you to change the color of the square to one of the colors you selected from your inspiration photo. All you have to do is enter one of the HTML color codes you jotted down and the box will magically change to that color!


Next, click on the Text button in the left side menu. Click on Add A Heading and a text box will appear in the middle of your color swatch. Click into that text box and type the HTML Color Code you used to make that swatch. Think of this step as creating those paint swatches you’d get at Benjamin Moore. (If you want to get really geeky (like me 🤓), you can also make up a name for your color.)

Click the Copy Page icon in the upper right (it looks like two pages overlapping each other) and repeat the process above for all of your colors! (Just click on each design element to make your changes to it.)

When you’re finished making all of your color swatches, go ahead and download them to your computer. Click the Download button that’s at the very top right corner of the screen, then choose Download from the menu. For File Type choose .jpg and for Select Pages choose all your pages. Click Download.
A zip folder will be created of all your images. You can unzip the folder and save the images to any location on your computer.

My Palette


Designing A Logo
Now that you officially have a color palette, you can move onto the logo design phase. In this section, I’m going to teach you how to design a simple logo using Canva. Before we get started, let’s quickly review the elements of a good logo:
Simple and timeless works best.
Logos with overlays and background imagery do not translate well across different printing applications. Your logo should be versatile and have the ability to be placed on a variety of back drops without losing its integrity.
Ok, now it’s time to jump back into Canva. Click on Create A Design and then choose Logo. I like to start with the text and then build my other design elements around it. So go ahead and click the Text option in the left side menu, then click Add A Heading.

Replace the placeholder text with your business name by simply clicking into the text box, deleting the placeholder, and typing in your business name.
If you look above the canvas, you’ll see a white menu running across. The very first option is fonts. With your text highlighted, play around with some different font styles until you find one you like the best. (Note: Think back to your Pinterest inspiration board. Was there a font style that stood out to you? Try to pick something similar!)

There are MANY fonts to choose from so take your time and have fun with this step however, do not overthink it! Just make sure that whatever font you go with is easy to read. (Think about scaling it down to business card size. How would it look?)
To change the color of your text, highlight it and then click on the A icon in the top menu. Click the + and then enter in one of your HTML Color Codes.

Moving along to adding some design elements (This step is optional. If you want your logo to just be plain text, that’s totally cool).
Click on Elements in the left side menu and go crazy ... but not too crazy. I recommend sticking to basic shapes and lines; nothing too intricate.
As you add your design elements, you can resize them and change the colors using the same steps we used for making our color swatches. Be sure to stick to the HTML colors in your palette.
Tip: If you need to arrange elements behind or in front of one another, click on Position in the top menu and choose either Forward or Backward.

After you’re done creating your masterpiece, download it as either a .png or .jpg file. (If you want to preserve transparency, you’ll have to upgrade to a paid version of Canva.)
BOOM! You officially have a brand design!


Make sure you create a branding doc that outlines all of your HTML Color Codes and fonts so you can always have it for reference.
Finally, one last thing to mention: HTML colors are for the web. If you plan on printing your logo/colors, you’ll need the equivalent PMS color codes. (PMS stands for Pantone Matching System.) To get these, visit Code Beautify. Enter each of your HTML color codes into the HEX field and choose 48 for the distance. Look through the PMS swatches that appear and take note of the one that most closely matches each HTML color. Add this info to your branding doc!
If you follow these steps to design your small business brand, hit me up and show me your design!
-J
Need help branding your small business? Let us do the heavy lifting!

How To Make A Content Calendar Using Google Drive
Planning out content in advance will save you from the stressful daily scramble of trying to come up with creative social media and blog posts. There are many tools out there for building content calendars but in today’s post, we’re going to teach you how to do it using your Google Drive.

Planning out content in advance will save you from the stressful daily scramble of trying to come up with creative social media and blog posts. There are many tools out there for building content calendars but in today’s post, we’re going to teach you how to do it using your Google Drive.
First off, you need to dedicate a few hours of quiet time to create your calendar. Depending on how much content you need to create from scratch, you may need a full day to work on this. However, it’s going to totally pay off so we highly recommend blocking out time and getting it done. 👊🏼
FYI: We build our content calendar a month in advance. We typically publish blog posts once a week so we make sure there’s enough material in the hopper before filling in the calendar.
We also like to craft social media content around our blog post topics. For instance, if we publish a blog post about How To Increase Organic Traffic To Your Website, then we’ll create one or two posts that tie in with that topic during the same week (i.e. a post about our Website Prep Planner and a tip for building a list of keywords).
The idea is to develop a cohesive communications plan. Once you get started, you’ll see how natural this becomes.
Creating Your Content Calendar Using Google Drive
Step 1:
Create a new folder on your Google Drive (and share it with any collaborators).
This is the main folder that’s going to house other folders and files. We named ours Content Calendar.
Step 2:
Create a folder within the new main folder and name it by Month and Year.
So, for example, if we’re building content for next month, we’d name the folder January 2019.

This is one week of content from our November calendar.
Step 3:
Create a new Google Sheet within the Month folder you just created.
Create a header row at the top of your sheet and enter the month and year. You can see in our calendar above, we’ve also highlighted this area in pink so it’s obvious what sheet we’re in.
Next, create seven rows for each day of the week. Underneath each day, fill in a general theme you’re going to use for content on that day throughout the month. In our example, you’ll see for November that we posted:
Blog content on Tuesday’s
A call-to-action (related to the blog topic) on Wednesday’s
A highlight on Thursday’s
A testimonial or inspirational quote on Friday’s
Then create your calendar by entering the dates that coordinate with each day. On our calendar, we made the text in these cells a lighter grey color.
FYI: Coming up with themes in advance will help you narrow in on the type of content you share on a daily basis. We plot out our themes so they’re consistent for the month (i.e. every Tuesday was a blog post promo in November). However, you can mix your themes up every week … it’s completely up to you!
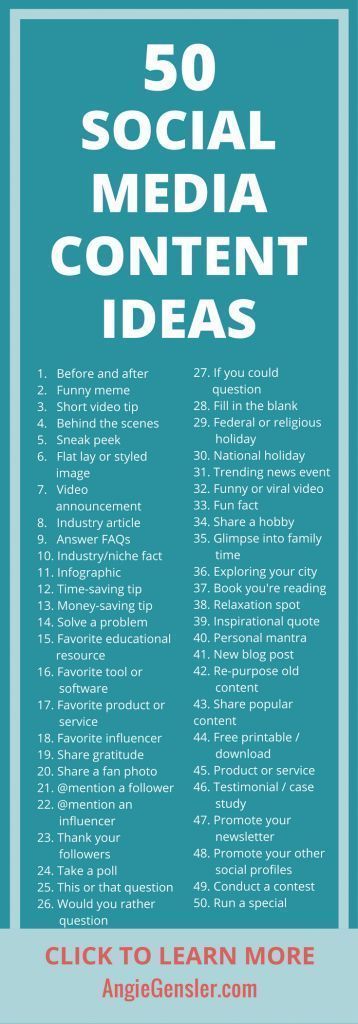
If you need some help coming up with topics and themes, check out this awesome list that Angie Gensler put together.
Using the themes you’ve determined, craft a message under each day you plan on posting content. We like to include our hashtags here as well. That way, we can copy and paste everything from the sheet directly into IG and Facebook.
Pro Tip 1:
If you want to use emojis in your caption, you can open up your iMessage on Mac, click to create a new message, and then enter your desired emoji into the type field. Copy and paste it from there into your Google Sheet.

Pro Tip 2:
If you plan on updating your IG bio link or using links in your Facebook or Twitter posts, you should paste these links in a cell below your caption for reference.
Step 4:
Create a folder within the Month folder to store images.
Collect the images you’d like to use for each post. Before dragging them into the Google Drive folder, rename them as the number of the day you plan on posting them. (i.e. Your image for January 17 would be named 17.jpg.) This way, you’ll know exactly what photo goes with what caption when it’s time to post.

Once you’ve uploaded all your images and filled in your monthly calendar, you can sit back and admire your work of art. And revel in the joy of knowing you have content lined up to share for the next four weeks! Woot-woot!
For tips on coming up with content for your calendar, read this blog post:
How To Create A Social Media Calendar
Get our Website Prep Planner, A 6-PAGE WORKBOOK TO HELP YOU ORGANIZE EVERYTHING YOU NEED FOR AN AWESOME WEBSITE.

How do I increase organic traffic to my website?
Your mom is going to visit your website. Your dog would definitely visit your website if he could use the computer. Strangers though? They need a reason to come visit your website. Wanting more organic traffic is pretty much a common theme amongst website owners. So how do you achieve that?

Your mom is going to visit your website. Your dog would definitely visit your website if he could use the computer. Strangers though? They need a reason to come visit your website. Wanting more organic traffic is pretty much a common theme amongst website owners. So how do you achieve that?
1. Make sure you have a specific goal for your website.
Do you want to book more appointments? Grow your list of subscribers? Sell your product? Pick one goal and design your website around it. The main navigation and any CTAs you use should all work toward achieving that goal. For example, if your goal is to book more appointments then you darn well better have several Book Now buttons on your homepage!
Designing a website without a plan is like trying to bake without using a recipe. Throwing a bunch of ingredients haphazardly into a bowl simply won’t work. That said, the first ingredient on every website recipe needs to be a clearly defined goal.

Goals to consider:
Book more appointments
Grow my email list
Sell my product or service online
Drive more foot traffic to my store
2. Know your target audience like the back of your hand.
Once you have the goal of your website locked down, next comes the heavy lifting. It’s a step in the design process that many people wish they could skip … persona research.
“A buyer persona is a research-based profile that depicts a target customer. Buyer personas describe who your ideal customers are, what their days are like, the challenges they face and how they make decisions.”
Researching and building your buyer persona(s) is a critical step of the website design process. Once you know exactly who it is you want visiting your website, you’ll have a much better handle on what it takes to get and keep them there. Your website needs to be a happy place for your target buyer persona. The messaging should speak to them in a language and style they can relate to. The content you provide should be very valuable to them.
“First, show your potential customers that you get them by addressing their pain or need - only then, will they be open to exploring what you have to offer.”
Another plus to fleshing out your buyer persona(s) is you’ll gain insight on where and how they seek information. Are there certain blogs they subscribe to? What websites do they go to for information? Are there specific keywords they’re using in Google searches? Knowing where your buyer persona is hanging out online makes it much easier to get your website in front of them.
CREATE THE PROFILE OF YOUR DREAM CLIENT USING OUR FREE CLIENT PERSONA BUILDER!
Once you know exactly what your dream client looks like, you’ll never make the mistake of taking on (or marketing to) a nightmare client again. Download our FREE Client Persona Builder tool today.
3. Perform keyword research.
If you want your website to have a chance of ranking in Google search results, then you need to do a little keyword research. Researching ideas for keywords is not rocket science either! You can get ideas from current customers or clients by simply asking them how they’d search for topics related to your business on Google.
You can also perform a little brainstorming session of your own. Open up a blank Word or Google doc and start typing as many search words or phrases you can think of as it relates to your business. After you have your list, start plugging your ideas into the Google search box. When you do this, you’ll notice at the bottom of the results page there is a list of other related searches. Add these to your list as well.
With your keywords plotted out, you can now craft your copywriting for SEO!
Read HubSpot’s Tips for Keyword Optimizing the Most Critical Parts of Your Website

4. Start blogging.
Blogging is a great way to get your small business found on Google. Each time you publish a new blog post, you’re adding a new page to your website that will eventually be indexed. This equates to more opportunities for you to show up in search results!
Your blog should provide value to your target buyer persona by answering their questions and offering up solutions. It should be educational … not sales-y.
A blog is the perfect way to showcase and share your industry knowledge with your audience. When you develop interesting and informative content based on your own expertise and experience it not only positions you as a thought leader, but also creates a fantastic opportunity to share something with your social networks.
Pro Tip! Consider guest blogging on a blog that your buyer personas like to frequent!
Download our free step-by-step guide to blogging!
Implement these four strategies and watch as organic traffic to your website begins to increase. Remember, content is king. Keep those visitors wanting to come back for more!

How To Start A Business Blog
Starting a business blog might seem like a daunting task but we’re here to assure you it isn’t. Today we’ll explain the importance of having a blog and then outline a basic roadmap for getting started.

Starting a business blog might seem like a daunting task but we’re here to assure you it isn’t. Today we’ll explain the importance of having a blog and then outline a basic roadmap for getting started.
Why You Should Have A Business Blog
A blog will help generate traffic to your website. If you’re optimizing your posts for search engines, overtime, they will begin to rank in search results. Blog posts also serve as great content for social media! If your topics are interesting enough, you can expect to see clicks to your website as well as shares.
Step-by-Step Guide For Starting Your Business Blog
1. Research your audience.
A business blog differs from a personal blog in that it focuses on a specific niche and audience. In order to craft blog posts that will draw in your target audience, you first need to identify exactly who your target audience is.
“If you have worked with your company for a long time, you may feel like you have a good grasp on who your customer is, but it still helps to actually put those ideas to paper. Are the majority of your customers male or female? Where do they live? What do they do for a living? What are their buying habits? What are their needs and challenges? What questions do they ask?”
By gaining a deep understanding of your target audience, it will be easier to develop content that truly interests them. Through this process, you’ll also learn what style your messaging should be delivered in and where you audience goes to seek information.
GET Jamie & Katie’s FREE Guide To Blogging!
2. Plot out your keywords.
In order to get found in Google searches, the content on your website and blog needs to reflect what potential site visitors are actually searching for. Make a list of as many long-tail and short-tail keywords as possible.
A long-tail keyword contains three or more words (i.e. chocolate wedding cupcakes Middletown). A short-tail keywords are typically under three words and essentially more broad in nature (i.e. chocolate cupcakes). You’ll want to include a healthy mix of both throughout your website and blog.
“Naturally, short term keywords are bound to give your website more hits since they are less specific. These short tail keywords are able to capture a bigger share of your target market. However, long tail keywords are more about giving quality hits than a large number of traffic. Targeting short tail keywords, however makes yielding positive results difficult and are often time consuming and expensive.”
(Quora)
3. Create an editorial calendar.
Once you’ve developed a list of keywords, coming up with topics to write about will be a breeze. If you’re still left feeling stumped, you can read our post, “3 Ways To Come Up With Blog Post Topics.”
We like to use an editorial calendar so we can tie our blog posts into our other marketing efforts such as social media campaigns and paid Google ads. By planning out our posts in advance, we can easily build other content around each topic and avoid the headaches associated with scrambling for new ideas each week. It’s all about being prepared!
4. Devise a plan for CTAs.
If you’ve enticed a visitor to read a blog post, don’t miss the opportunity to engage them even more! Include a call-to-action that fits the context of each post. Let the reader know what action you’d like them to take next. If you published a post about The Benefits Of Hot Yoga, offer them a Beginner’s Guide To Yoga Poses or a coupon to try a free class. The idea is to keep the visitor active on your website for as long as possible.
5. Track your success.
Whatever platform you use to host your blog, make sure you’re getting the most out of it. Regularly analyze the traffic and CTA clicks for each post so you can see how it stacks up against the rest. Having these insights will allow you to better leverage your hot topics in the future!
6. Share your posts with the world!
Put your social media sites to work and be sure to share each and every blog post with your networks! Include an inspiring image that relates to the post (along with the link) and encourage your followers to share. This will help drive traffic to your blog and hopefully score you new subscribers!
Ready to master the art of blogging?


4 Easy Ways To Capture Leads On Your Website
Think of your website as a salesperson who works for you 24/7. Have you equipped this salesperson with all of the necessary tools to ace their job? Not only should your website contain a wealth of interesting and helpful content for visitors, but it should also serve as a portal for capturing new leads! In this blog post, we’re going to share a few easy ways to do this.

Think of your website as a salesperson who works for you 24/7. Have you equipped this salesperson with all of the necessary tools to ace their job? Not only should your website contain a wealth of interesting and helpful content for visitors, but it should also serve as a portal for capturing new leads! In this blog post, we’re going to share a few easy ways to do this.
1. Put your high-traffic pages to work.
Each month, you should actively review your website data. Don’t worry … this is not as scary as it sounds. If your website is integrated with Google Analytics, then you already have access to a plethora of valuable statistics. One piece of data that we like to regularly monitor is page traffic. Page traffic outlines what content your site visitors are most interested in and essentially points you in the right direction for CTA placements.
A call-to-action, or CTA, is an image or line of text that prompts visitors, leads, and customers to take action. It is, quite literally, a "call" to take an "action." (HubSpot)
Many times, CTAs are linked to landing pages where a visitor can complete a form. This form might allow them to book a consultation, download a free piece of content, or even enter some sort of contest. Regardless of what the form is linked to, its sole purpose is to collect information from website visitors.
Placing CTAs (that ultimately link to forms) on your top performing website pages will allow you to strategically capture leads. Just be sure that your offers are enticing and relevant to the website pages you’re promoting them on!
2. Use pop-up boxes.
A fantastic way to grab new blog subscribers is to use pop-up or subscription boxes on those high-performing pages we just discussed. If you’ve poked around on the LMG website, then you’ve probably already noticed how we use these.

That little pink box in the lower left corner = a lead generation tool.
So how did we create these nifty little pop-ups? Using HubSpot, of course! The great news … you can do this even with their most basic FREE Marketing Hub subscription! If you’re interested in learning more about getting your website synced up with HubSpot, then reach out to us.
Lead generation pop-ups can be as loud or subtle as you want them to be. On our homepage, for example, a visitor is only presented with the pop-up box after they scroll through 50% of the page. The box itself is also pretty non-intrusive. It simply appears in the lower left-hand corner of the screen. And we have it set to not reappear for a certain length of time if a visitor X’s out of it.
3. Present visitors with an option to subscribe on every page.
You never know when a website visitor might feel inspired to subscribe to your content. So give them the option to do so on every single page! Whether it’s via a simple button or perhaps a basic one-field form at the bottom of each page, be sure your website visitors have a quick and easy way to subscribe to your content as soon as they want to.
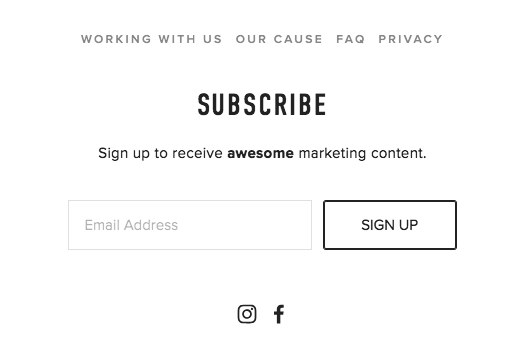
This section is found at the bottom of every LMG web page. It gives visitors a quick and easy way to subscribe to our content. Speaking of which, why haven’t YOU subscribed yet?
4. Activate the power of your blog.
A business blog serves a number of different purposes … the most obvious one being a platform to share valuable content and information with your website visitors. However, the importance of blogging runs much deeper than this. Did you know that each time you publish a new blog post, you’re adding a new page to your website that will eventually be indexed by Google? This equates to more opportunities for you to show up in search results!
Want to learn more about this? Read our blog post on How To Get Found In Google Searches!
Now let’s tie that into our topic of capturing new leads. By including an enticing call-to-action in every blog post, you can acquire pertinent information on new prospects. Having intel on where a future customer is in the buying process (as well as their needs, pain points, and desires) will tremendously improve your ability to effectively market to them in the future.
When placing CTAs within your blog posts, try experimenting with different options in terms of color, style, and even placement. We’ve found that when we place CTAs closer to the top of our posts, they get clicked on more. Graphic CTAs as opposed to linked text also tend to yield a better result. You’ll want to do a little of your own testing to determine what works best with your website visitors.
Remember what we said at the beginning of this post … your website is a 24/7 salesperson! Put it to work by incorporating lead capture mechanisms throughout and never miss another opportunity.
Ready to revamp your website for 2019? We’ll give you a FREE 15-minute consult!

Tuesday Tip #15: How To Create A Social Media Calendar
Raise your hand if you’re fed up with social media! Just when you think you’ve figured out the secret to success in growing your fan base and increasing engagement … BAM! … another algorithm change is announced. Not to mention, it’s one that will turn your current strategy completely upside-down. Ugggghhhh.
A social media calendar will help you stay on point. Yes, it will take some work on the front end but that work will pay dividends in the end. By strategizing and outlining your posts in advance, you’ll drastically reduce the daily stress that comes with managing social media accounts. In this post, we’ll teach you how to put together your first social media calendar!

Raise your hand if you’re fed up with social media! Just when you think you’ve figured out the secret to success in growing your fan base and increasing engagement … BAM! … another algorithm change is announced. Not to mention, it’s one that will turn your current strategy completely upside-down. Ugggghhhh.
Ok, don’t throw in the towel yet. Instead, first read our post on How To Grow Your Social Media (which outlines ways to work with the latest algorithm updates). Then, get yourself organized. It’s hard enough to try and stay current with the constantly changing rules of engagement on social media. Combine that with the energy it takes to create interesting posts on a daily basis … we’re talking lots of EFFORT, folks! That’s why putting together a social media calendar is so critical.
A social media calendar will help you stay on point. Yes, it will take some work on the front end but that work will pay dividends later on. By strategizing and outlining your posts in advance, you’ll drastically reduce the daily stress that comes with managing social media accounts. Staying organized and consistently posting great content will put you at a major advantage. Try it for a month and you’ll see exactly what we mean!
So where to begin? Well, right here, actually. We’ve developed some simple guidelines to help you create your first editorial calendar for social media!
Determine what kind of content has performed best for you in the past.
With Facebook’s new algorithm change, content that doesn’t spark reactions/comments/shares has no chance of reaching a larger audience. That said, you’ll need to rely upon analytics to see what has worked for you in the past. On Facebook and Instagram, you should take a deep dive into your Insights and make note of the posts that outperformed the rest. This will be a great starting place for building your calendar.
Figure out your optimal posting times.
To get the biggest bang for your buck, you'll want to publish content during the times your audience is actually using social media. On Facebook, you can go to Insights and look in the Post Engagements section. This is where you’ll be able to see what days and times your audience engages the most.
Build your editorial calendar.
Now that you know what content resonates most with your audience and when to post, you’re ready to start building your social media calendar. First, let’s highlight some of the tools you can use to do this:
After you pick the tool that will work best for plotting out your posts, you can fill in your calendar with content, links, images, infographics, and more.
“These social messages will ensure you’re providing your audience with smart, useful content and give them a reason to follow you. Additionally, you can find relevant holidays or events–from Thanksgiving to National Ice Cream Day–that you can tie in with your business.” (Sprout Social)
Prioritizing content should also be a part of your process. Sprout Social makes some great recommendations for doing this:
“Think through your must-haves, whether it is a product release or scheduled company announcement, and develop content to promote those initiatives. Additionally, make sure you’re planning out how much promotion each initiative warrants; some large releases should have multiple social posts while others only warrant one. Lastly, pump up the personality of your editorial calendar by planning out posts that highlight company culture or showcase who you are as a brand.”

Organize your hashtags.
Adding hashtags to your social media posts will increase their chances of getting discovered. Do some research to determine which hashtags are trending in your industry. Jot them down in a Google doc along with any other hashtags that are specific to your brand or simply ones that you see a benefit in using. Organizing your hashtag library in one place will save you from trying to remember what to use with each post.
Master the art of repurposing great content.
If you published a case study or blog post that your audience loved, come up with fun ways to continue promoting this high performing content on social media! For example, you can design an infographic to highlight takeaways from a longer piece of content. Or how about creating a short little video that ties in with the topic as well? There are endless ways to draw more attention to the great content you already own.
Yes, managing social media can be stressful … but when you plan ahead, the process is so much easier to handle!
If this post persuaded you to try making your first social media calendar, comment down below!
Every Tuesday we share easy and actionable advice you can take to refresh your current marketing plan. Follow us on Facebook and Instagram to see more!