

Blog Categories
Web design Branding Blogging Social Media Inbound All
We post weekly tips, tricks, and marketing advice to help grow your business.

How To Start A Newsletter
A newsletter is a great way to stay in front of your clients, fans, and followers. Whether you’re running a special promotion or have a few new blog posts you’d like to share, a newsletter is the perfect vehicle to recap all the latest and greatest things you have going on in your business. In today’s post, we’re going to walk you through the basics of starting a newsletter.

A newsletter is a great way to stay in front of your clients, fans, and followers. Whether you’re running a special promotion or have a few new blog posts you’d like to share, a newsletter is the perfect vehicle to recap all the latest and greatest things you have going on in your business. In today’s post, we’re going to walk you through the basics of starting a newsletter.
Decide on a schedule.
If you want to start a newsletter for your small business, you’ll have to commit to being consistent. Just like with a blog, once you send out your first newsletter, your audience is going to expect to regularly hear from you. Don’t let them down by being inconsistent. Devise your game plan up front and create a publishing schedule that you can reasonably manage. Once per month. Once per week. Whatever it is, just be sure you can adhere to it.
Plan your content ahead of time.
There’s nothing worse than scrambling to throw together content at the last second. If you’re going to commit to running a newsletter, you’ll have to organize your content and plan ahead. If you’re publishing a monthly newsletter, you should develop your topics and content a month in advance. Look at what you’ll be posting on social media and your blog and flesh out the substance of your upcoming newsletter from there.
Pick a platform.
Ok, let’s talk tech. There are many different email platforms available out there. And quite frankly, you should use whatever one you’re most comfortable with. However, some things you might want to look for in an emailing software are:
Responsive templates
Design flexibility
Ability to segment your contacts
Opt-out management
Automation
Reporting tools
Customer support
Familiarize yourself with your email software.
Make sure you’re completely comfortable using all aspects of whatever email software you decide upon. Play around with it ahead of time and tinker around with the design tools. You definitely won’t want to be fumbling around on the day your newsletter is supposed to launch. Outside of actually designing the newsletter, you’ll want to know how to create your email distribution lists and then how to analyze the results at the end of each campaign.

Feeling frantic is fun…
Said no one ever.
Create a buzz.
Prior to launching your newsletter, it will be important to drum up some excitement about it and start building your list of subscribers. Consider running a marketing campaign two to four weeks before publishing your first newsletter. Let your fans know what kind of content you’ll be sharing and why they should subscribe. This is key! People get more than enough junk mail and they certainly aren’t looking for more. Make sure you clearly communicate all of the benefits of opting in to your newsletter.
Make it easy to subscribe.
Actively promoting your newsletter will be the key to growing your subscriber base. We recommend setting up a landing page on your website where people can go to subscribe. Anytime you advertise your newsletter, you should link to this page. The landing page should also reiterate all of the benefits people will enjoy by subscribing to your newsletter. Again, get them excited about hearing from you! Aside from talking about your newsletter on social media, you can drop a few subtle hints about it by including a subscription box in the footer of your website and including a subscription link in your email signature as well.
Know where to go for graphics.
Quality newsletters not only sound great, but look great, too. As you’re planning out your content, think about what images your can pair with the various topics you’ll be writing about. If you plan on taking photos yourself, make sure they’re high quality. There’s nothing wrong with using photos taken on your iPhone IF they look professional. Don’t ever use blurry or low resolution images in your newsletter. If you take photos yourself, make sure the lighting is optimal and follow the rule of thirds. (For more tips on taking amazing photos using an iPhone, read this blog post.)
If you’re looking for stock imagery, we’ve got you covered. Check out the sites below. They’re a few of our personal favorites for beautiful stock photography.
Pixabay
Pexels
Unsplash
Adobe
Creative Market
Important note about photos! Be sure to keep the photos you use in your newsletter under 500KB a piece. Large file sizes will load slowly and make for a less than desirable reader experience!
By planning ahead, you’ll set yourself up for success with your small business newsletter. Remember, the key is consistency. Dedicate time and energy to consistently publishing great content and watch those subscriber numbers GROW!
Download our FREE Website Planner!
It’s the ultimate workbook to help you organize everything you’ll need for creating an awesome website.


Branding Your Boudoir Photography Blog
Earlier this week we published a new article on How To Design A Blog Post. While it’s important that your posts are interesting to your audience and grammatically correct, there’s another aspect of blogging that sometimes gets forgotten about. The design.
In Tuesday’s post, we shared tips for making your content shine by applying some simple design concepts. And, of course, that got us thinking about our core client … the boudoir photographer. In today’s post, we’re going to share nine design tips specific to a boudoir photography blog.

Photo by Jernej Graj on Unsplash
Earlier this week we published a new article on How To Design A Blog Post. While it’s important that your posts are interesting to your audience and grammatically correct, there’s another aspect of blogging that sometimes gets forgotten about.
The design.
In Tuesday’s post, we shared tips for making your content shine by applying some simple design concepts. And, of course, that got us thinking about our core client … the boudoir photographer. In today’s post, we’re going to share nine design tips specific to a boudoir photography blog.
1.) Coordinate your blog design with your website design.
Keeping in line with your brand is incredibly important. (FYI: This applies to everything you put out there, not just your blog.) The fonts. colors, and patterns that you use on your website should be incorporated into the design of your blog. Mismatched marketing leads to an audience disconnect and will ultimately stunt your brand recognition efforts. When visitors to your website hop over to your blog, or vice versa, they should feel like they’re still in the same space.
2.) Create a header.
According to the Brand Solopreneur:
“A header is the first thing a visitor sees when landing on your blog, so just like a bad piece of meat can ruin a dish, a poorly constructed header can squander a first impression.”
Your header should include your logo and also a clear, concise description of what your blog and brand are all about.
The Brand Solorpreneur also has this to say about creating a blog header:
“Be aware of what I call the ‘hotdog effect’ when designing your header. You do not want to put everything but the kitchen sink in there. Your header is a qualifier for visitors. It should tell them enough that they can make a quick determination if they want to learn more or leave.”
3.) Use pull quotes and big, bold headers to satisfy the skimmer.
Boudoir is a hot topic and there are many questions your future clients need answered. Make sure your blog posts are easy to skim. The main points of each article should stand out from the rest of the text, allowing the reader to get the gist of the post even if they don’t have time to read the entire thing.
In a study on how people read websites, the Nielsen Norman Group discovered that “79 percent of test users always scanned any new page they came across; only 16 percent read word-by-word.”
Needless to say, it’s important to highlight the main points of your post in order to keep people scrolling through the content!
4.) Use photography that identifies with your target client persona.
Your blog is the perfect place to attract new client leads. So make sure you’re doing what it takes to attract the right ones! People are visual by nature so imagery will play a key role in your blog design. While you’ll want to use photos that reasonably coordinate with the topics of each post, you’ll also want to consider whether or not the photos you select will resonate with the right people (a.k.a. your target client persona). Each time you go to select photos to use with your blog posts, keep your dream client in the back of your mind and ask yourself how each photo would make them feel. Would it appeal to them or be off-putting in some way? Again, your blog should be a lead generating tool. Get the right leads for your boudoir business by always keeping your target client persona at the forefront of your copywriting and design decisions!
5.) Promote your workbooks, guides, checklists, etc.
Do you offer a free guide, workbook or checklist to your website visitors or clients? Content offers like these should be promoted in every single one of your blog posts. Remember what we just talked about above. You need to treat your blog like a lead generating tool. If you’re not giving visitors an obvious way to opt-in to your content, you’re missing an enormous opportunity!
6.) Tell a story.
Boudoir photography is all about empowerment. Take a moment to think about just how many people’s lives you’ve touched. Just how many women you’ve made feel BEAUTIFUL. These stories are pure gold for your blog.
The art of boudoir photography is simply unknown to many people. Some might even think it’s scary or intimidating. However, seeing and reading about actual human beings who went through the experience can be a very powerful thing. Utilize your evangelists and ask to feature their stories and sessions on your blog!
7.) Include social sharing buttons!
If you’re a boudoir photographer, there’s a good chance you’re using various other social media platforms to promote your brand. Give your blog visitors an opportunity to easily share your fabulous content with their networks by including social sharing buttons within your blog posts.
8.) Be mindful of photo file sizes.
Like your website, your blog should feature high quality photos but be sure to keep each of them under 500KB. Filling your blog posts with extremely large photo files will seriously slow down page loading times. (And this is annoying 😩) Give your blog visitors a user-friendly experience so they stay around for a while!
9.) Make your content easy to search.
Whether you organize your posts by using categories and tags or simply offer search functionality within your blog, your content should be easy for visitors to sort through and navigate. (Pro Tip: Offering up a topic listing can definitely help lead people in the right direction!)
And there you have … nine tips for making your boudoir blog even more amazing than it already is!
Need a little help getting your boudoir photography blog off the ground.
Find out how we can help by requesting a free 15-minute consult today! We specialize in working with boudoir photographers just like you.

How To Design A Blog Post
Blogging is about more than just writing a wonderful piece of content that your audience will love. It’s about making it pleasing to the eye, too! It doesn’t matter how amazing your post is … if the page layout is distracting, confusing, or cluttered, your readers are going to bail. And what a shame that would be considering all of the time and effort it takes to create a post to begin with!
Today we’re going to share some tips on how to lay out each of your blog posts in an aesthetically pleasing way. Let’s hop to it.🐰
Ok, we love data and statistics so let’s start things off with this little nugget:
“According to a recent U.K. survey, bloggers have ranked as the third most trustworthy source of information, following only friends and family. That's right -- bloggers are trusted more than celebrities, journalists, brands, and politicians.”
(HubSpot)
If you’re providing valuable content consistently, it’s inevitable … you’re going to create a following. (Yay!👏🏼) However, people are visual. If your blog posts are filled with annoying pop-up ads or offer little relief in the way of white space, visitors are not going to stay for long. (Boo!👻) The good news: You do NOT need any kind of graphic design skills to lay your posts out in a visually appealing way! Simply follow these tips and you’ll be golden!
Tip 1: White space is your friend.
Ever visit a blog or website that’s stuffed like a Thanksgiving turkey with text? Everywhere you look, all you see is words, words, and more words! Ahhhhhh! That’s a big ouchy for the eyeballs. 👀
The trick with laying out any webpage is incorporating white space so the content feels easy to read and absorb. Make sure there’s a healthy amount of white space in the margins of your page as well as between paragraphs.
Tip 2: Organize your content with headers and bullets.
Most of us love to skim. We’re all super busy people who are on the hunt for fast access to information! Yes, it’s every blogger’s dream that visitors will sit down with a cup of coffee and leisurely soak in every last drop of each post. News flash: This is NOT reality! The majority of people scan content.
In a study on how people read websites, the Nielsen Norman Group discovered that…
“79 percent of test users always scanned any new page they came across; only 16 percent read word-by-word.”
Keeping this in mind, be sure to break up your content using headers, sub heads, and bullet points wherever possible. This will make your posts significantly easier to scan and digest.
Tip 3: Be on brand.
The imagery and accent colors used in your blog posts should represent the look, feel, and style of your brand. You don’t need to be like Skittles and utilize every color of the rainbow. In fact, that’s a bad idea when it comes to blog post design. Keep your color palette a simplistic representation of your brand.
Now let’s talk about imagery. If you’re in the business of photography, then you can pretty much skip this paragraph because, by nature, you already have a plethora of fantastic photos to choose from. (And we’re very jealous of you.) However, if you’re like the rest of us, you probably need to make use of stock photography.
Stock photos are a great way to add visual interest to your blog posts IF you’re selecting the right kinds of imagery. Be aware, there are some incredibly cheesy free stock photos floating around on the Internet. There are also some extremely beautiful stock images that you can use 100% free!
Our favorite sites for free stock photos are:
There are also sites such as Shutterstock, Getty Images, and Adobe Stock that you can purchase very unique, gorgeous stock photography from.
One important thing to mention here is NEVER EVER take a photo from Google images without fully understanding what the licensing and copyright details are. (In most cases, these photos belong to someone else and you don’t have permission to use them.) Your safest bet for incorporating photography into your blog posts is using one of the stock photography websites we’ve referenced above.
Tip 4: Make your links obvious.
If you link to other websites or resources within your blog post, make sure the hyperlinks are obvious so the reader knows where to click in case they wish to learn more. We use an accent color for our hyperlinks.
We also like to have external links open in a new window. This way, our website will remain open while the person is exploring a link that takes them off our site. If they do more clicking from there, our site will still be open in another tab and be easy to get back to if they wanted.
Tip 5: Place your CTAs above the fold.
Many business owners use their blog as a way to capture new leads. Aside from grabbing actual subscribers to your blog, you can utilize CTAs (calls-to-action) to get readers to click and complete some type of form. The CTA can be to download a guide (that relates to your blog post) or request a free consult. Whatever the action is that you want the reader to take next, be sure you tell them early on in the post! Remember, people tend to scan web pages and they don’t always make it all the way to the bottom. Place your enticing CTAs above the fold or above the point where they’d have to scroll to see more of the screen.
Tip 6: Offer a way to search.
We’ve all become spoiled by Google. We see a search box, plug in a few words, and BOOM! We’re instantaneously presented with all sorts of results! Your blog should offer this same level of convenience. Providing a search tool for readers will allow them to quickly find the type of content they’re looking for … and this will make them very happy.
And there you have it … six tips that can transform your blog for the better.
We design blogs using SquareSpace!
It’s the easiest, most user-friendly platform out there. If you’re looking to start a blog, free book a consult to learn more.

How To Make A Mood Board On Pinterest
Mood boards can be incredibly helpful in the website and branding design process. In this blog post, we’re going to explain the benefits of creating a mood board and how you can make one using Pinterest.

Mood boards can be incredibly helpful in the website and branding design process. In this blog post, we’re going to explain the benefits of creating a mood board and how you can make one using Pinterest.
What’s a mood board?
Remember back in the day when you used to make those colorful collages out of magazine clippings? You’d forage your favorite publications for photos, words, or quotes that inspired you and then excitedly glue them to a poster board. Well, that’s the same concept behind a mood board!
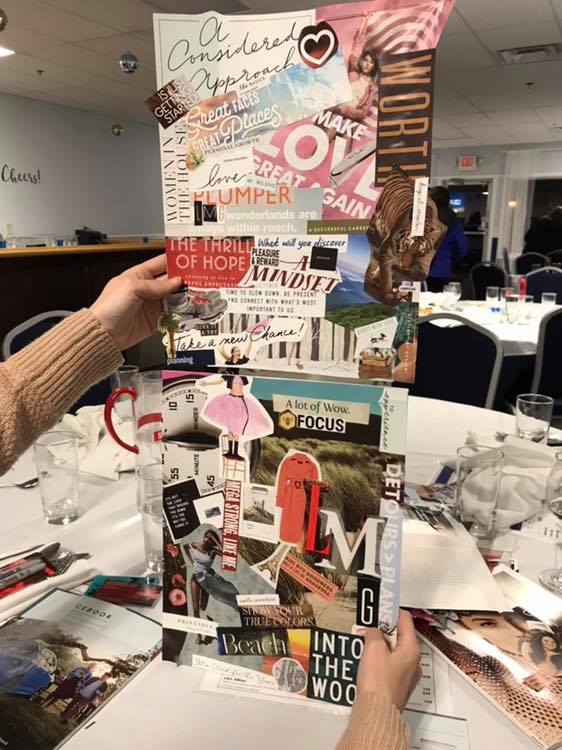
Me and Katie attended a networking event this month and we made old school inspiration boards. How did we do?
When we’re working with a website design or branding client, we have them make a mood board on Pinterest (which, by the way, is much easier than using magazines, scissors, and glue). When searching for images, we ask the client to keep their target buyer persona in mind and choose the things that would inspire them. Remember, when designing a website or brand, it’s more about what your target customer will like than about what you like. (However, if you and your target customer happen to like the same kinds of things, well … that’s even better! It makes creating your mood board a bit easier.)
How To Create A Mood Board For Branding Or Website Design
Step 1:
If you don’t already have one, write a clear and detailed description of your target buyer persona. This step is key! Again, your brand and website needs to resonate with this person. If you need help, we recommend reading HubSpot’s blog post: How to Create Detailed Buyer Personas for Your Business. In it, there’s a free Persona Templates Guide you can download.
Step 2:
If you’re a creative entrepreneur, chances are, you already have a Pinterest account. If you don’t, you’ll need one for this exercise! To do this, go to Pinterest.com and enter:
Your email
A password
Your age

(Note: You can also sign-up using your Facebook or Google account.)
Step 3:
Once you’re logged in, access your profile by clicking on your name in the top right corner of the screen. Then scroll down the page a bit and click on the Boards option that’s underneath your info. If you’re an active Pinterest user, you’ll see all of the boards you’ve already created here. If you’re new to Pinterest, this area will be empty.

Step 4:
Within the Boards section, click the red plus sign to Create Board. In the pop-up box that appears, you can name your board Mood Board (or any other fun name you can come up with). Then click Create.

Step 5:
Now it’s time to fill that board with all the things your target buyer persona would love! When you create a new board, Pinterest will offer up some ideas for it. You can search through those ideas or start typing words in the search bar at the top of the screen. (Note: searching is an easy task when you have a crystal clear description of your target buyer persona!)

As an example, we’re going to show you an actual buyer persona profile (below) so you can make the connection on how the details might affect your search.
Name: Carly
Age: 34
Location: Philadelphia, PA
Relationship/family status: Married (no children)
Pets: Boston Terrier
Education level: Bachelor’s Degree
Occupation: Interior Designer
Annual income: $90,000
Favorite Blog: Design Hunter, Eye Swoon, House of Brinson
Magazines or books: Anything Lisa Scottoline and the latest Pottery Barn catalogue
Hobbies: Sketching rooms/outdoor scenery, yoga, collecting art, and cooking healthy meals
Brands: Pottery Barn, RH, White House Black Market, Hello Fresh
Social media platforms they spend time on: Pinterest, Instagram
TV: Everything HGTV and Food Network
Based on Carly’s profile, here are the search queries we used to fill our board!
Philadelphia
Philadelphia Interior Design
Philadelphia Signage
Fruits
Vegetables
House of Brinson
Pottery Barn
Career Woman Quotes
Scenery Sketches
Artwork
Yoga
The most important part of Step 5 is: Do NOT overthink it! Search terms that are related to your target buyer persona and pin anything that stands out to you!
Here’s the board we came up with for our example buyer persona, Carly …
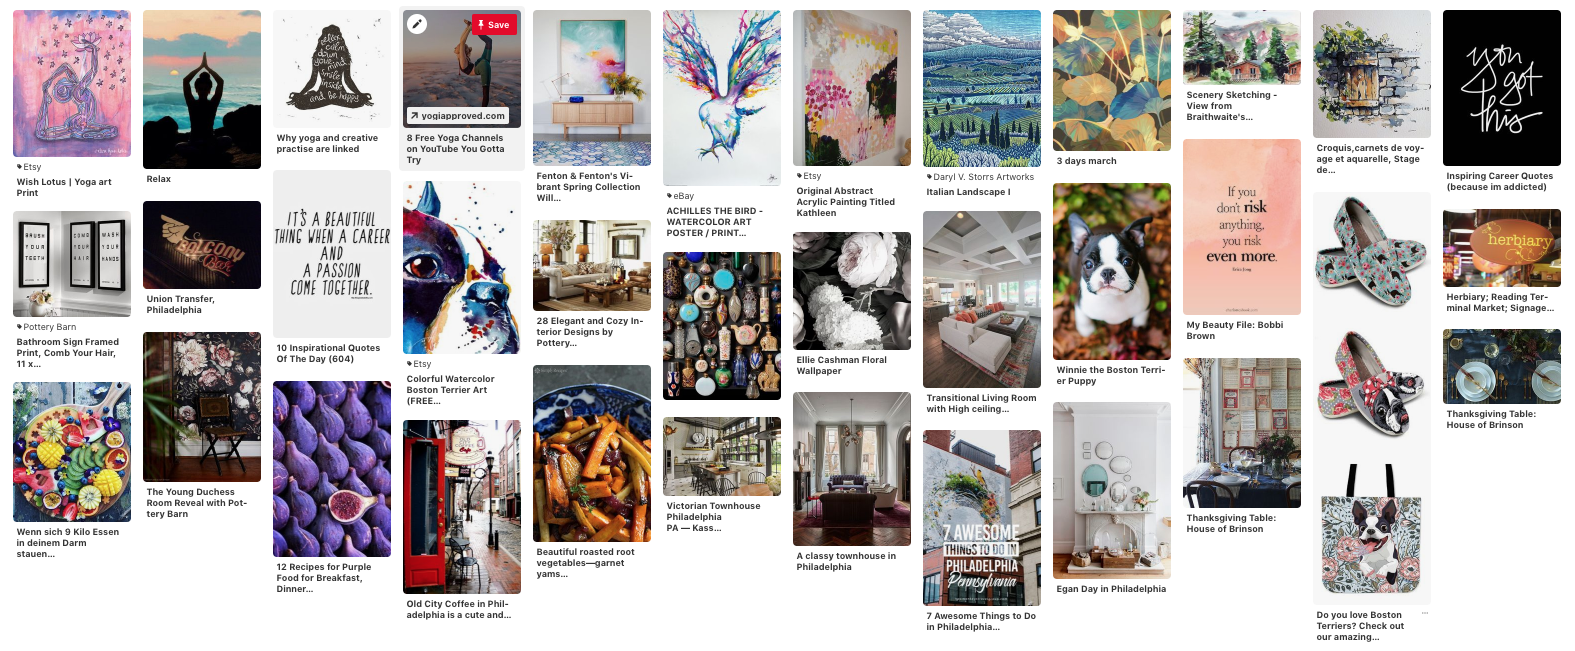
Take a step back and look at your mood board as a whole. Are there any common elements that stand out to you (i.e. colors, patterns, fonts, objects, etc.)? Jot them down because they can be incorporated into your website and/or brand design!
Step 6:
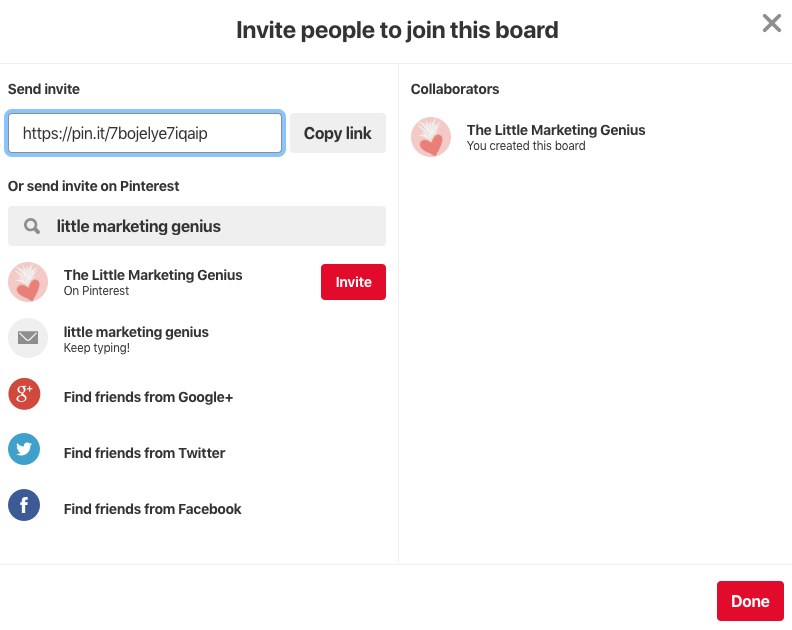
If you purchased a website or brand design package from LMG, you’ll need to share your mood board with us. To do this, go into your board and copy the URL from your web browser. Then, paste that URL in the Mood Board section of your Branding Prep Planner. (If you made your board secret, you can share it with us by clicking the little icon of a person with a plus symbol at the top of your board. Search Little Marketing Genius and then click Invite.)
Mood boards are super fun to create. And by building a board from the perspective of your target buyer persona, you’ll end up with a fantastic visual of what inspires them. Give this exercise a spin and comment below with your findings!
Looking to take your small business to the next level? We can help design a brand your target audience will love! Book a free 15-minute consult with us to get the process started today!

5 Must-Have Elements For A Fabulous Boudoir Photography Website
Fun Fact: More than half of the clients we serve are in the business of boudoir photography. I guess you can call it our niche! In working with boudoir photographers, we’ve learned a lot about what it takes to attract clients … a fabulous website, of course, being one of the things. In this blog post, I’m going to share five must-have elements for a boudoir photography website.

Fun Fact: More than half of the clients we serve are in the business of boudoir photography. I guess you can call it our niche! In working with boudoir photographers, we’ve learned a lot about what it takes to attract clients … a fabulous website, of course, being one of the things. In this blog post, I’m going to share five must-have elements for a boudoir photography website.
#1. A portfolio that resonates with your ideal client.
If you follow our blog then you know that every successful marketing project begins with a deep understanding of your ideal buyer persona. With a photography website, it’s critical that your portfolio pieces speak to the type of client you’re looking to attract.
If you’ve never written a profile for your target buyer persona, I strongly suggest taking the time to do so. To start the process, just think about the most amazing client you’ve ever worked with. From there, craft their story. If you get stuck, HubSpot has some pretty neat tools for creating buyer personas:
Once you’ve completed the exercise and you have your profile pretty well fleshed out, perform an in-depth review of your portfolio pieces. Do they accurately represent that amazing client who you based your buyer persona profile on? If not, it’s time to refresh those portfolio pieces with photos that will better resonate with the type of client you love working with the most.
#2. Helpful insights into your process.
The thought of doing a boudoir photography session can be intimidating to someone who is brand new to the experience. By sharing detailed insights into your process and setting clear expectations up front, you can help ease some of these anxieties and better guide the prospective client through their sales journey.
Again, let’s think about your favorite clients. What were their initial hesitations and how did you help resolve them? Sharing this type of information will establish a level of trust and hopefully prompt prospective clients to take the next step toward contacting you.
#3. A blog.
Blogging is a highly effective way to not only showcase your special projects and serve as a resource to site visitors, but to improve your SEO as well! Yes, we know that writing blog posts is probably buried on your To-Do List. (Pretty much every boudoir photographer we work with juggles an incredibly hectic schedule most days.) However, blogging is an investment that will pay dividends down the road.
I recommend creating a content calendar. Take a day to plot out all of your blog posts for the month. (Don’t hate me but I’d love to see you shoot for one post per week 😧). Based on that, you can then organize social media posts and email marketing campaigns that will tie in.
Need some help launching your blog? Read this blog post we recently published: How To Start A Business Blog
#4. A prominent opt-in gift.
As a boudoir photographer, you probably view your email subscribers as gold. They’re the people who are very interested in what you have going on and are probably following you on social media as well. These are the people you need to stay in front of.
So how do you grow that golden list of subscribers? With a free opt-in gift, of course. The truth is, when people visit your website, they’re visiting for a reason. Most likely, they’re interested in the services you provide. However, the people who are very interested in your services are the people who are willing to give you their email address. It’s their way of raising their hand and shouting, “Yes! I’m interested in what you have to say.”
Unfortunately, I’m here to tell you that a boring old subscribe button is probably not enough. People are hesitant about signing up for emails these days. If someone is already interested in your service (which is evidenced by them being on your website to begin with), they’ll be more inclined to download a guide or checklist from you. Yes, these downloadable freebies are what we refer to as opt-in gifts!
When coming up with your opt-in gift, try and think about something that would be especially helpful to a potential client. Maybe it’s a checklist of 10 Things To Do Before Your Boudoir Photography Session. Or perhaps it’s a Guide To Getting Ready For Your First Boudoir Shoot. Whatever you decide, be sure the value of the free gift is enough to make them enter their email address in order to access it.

Pro Tip:
The opt-in gift could be something you already use with clients to prepare them for working with you! Do you have a checklist or worksheet that you provide to a new client before their session? Transform it into an opt-in gift!
Last but not least, your opt-in gift should be prominent on your homepage. If one of your main website goals is to increase your subscriber list, I would recommend placing your opt-in gift within the footer as well so it ends up on every page. You can also promote it in your blog posts and on your top performing web pages to really ensure it gets noticed!
#5. A descriptive bio and testimonials.
Booking a boudoir photography session is obviously an intimate and personal experience for many clients. Knowing they’ll be exposed and vulnerable in front of a photographer they’ve never met before can be very frightening! You can ease some of these fears by designing a highly personalized bio on your website. Share your background and also some of the things you like to do outside of work. Incorporate photos of yourself and some behind the scenes shots, too. This type of content works incredibly well in a bio.
Testimonials are another great way to increase trust. According to a 2018 Local Consumer Review Survey conducted by Bright Local:
91 percent of people regularly or occasionally read online reviews, and 84 percent trust online reviews as much as a personal recommendation.
It goes without saying, showcasing testimonials is another key to establishing trust with potential new clients. Whether you dedicate an entire web page to testimonials or creatively display them on your homepage, it’s important to highlight what happy clients are saying about you!
Is your boudoir photography website generating qualified new leads for you?
If the answer is no, book a free 15-minute consult with us! We’d love to take a peek at what you’re doing and give you some feedback!

How do I increase organic traffic to my website?
Your mom is going to visit your website. Your dog would definitely visit your website if he could use the computer. Strangers though? They need a reason to come visit your website. Wanting more organic traffic is pretty much a common theme amongst website owners. So how do you achieve that?

Your mom is going to visit your website. Your dog would definitely visit your website if he could use the computer. Strangers though? They need a reason to come visit your website. Wanting more organic traffic is pretty much a common theme amongst website owners. So how do you achieve that?
1. Make sure you have a specific goal for your website.
Do you want to book more appointments? Grow your list of subscribers? Sell your product? Pick one goal and design your website around it. The main navigation and any CTAs you use should all work toward achieving that goal. For example, if your goal is to book more appointments then you darn well better have several Book Now buttons on your homepage!
Designing a website without a plan is like trying to bake without using a recipe. Throwing a bunch of ingredients haphazardly into a bowl simply won’t work. That said, the first ingredient on every website recipe needs to be a clearly defined goal.

Goals to consider:
Book more appointments
Grow my email list
Sell my product or service online
Drive more foot traffic to my store
2. Know your target audience like the back of your hand.
Once you have the goal of your website locked down, next comes the heavy lifting. It’s a step in the design process that many people wish they could skip … persona research.
“A buyer persona is a research-based profile that depicts a target customer. Buyer personas describe who your ideal customers are, what their days are like, the challenges they face and how they make decisions.”
Researching and building your buyer persona(s) is a critical step of the website design process. Once you know exactly who it is you want visiting your website, you’ll have a much better handle on what it takes to get and keep them there. Your website needs to be a happy place for your target buyer persona. The messaging should speak to them in a language and style they can relate to. The content you provide should be very valuable to them.
“First, show your potential customers that you get them by addressing their pain or need - only then, will they be open to exploring what you have to offer.”
Another plus to fleshing out your buyer persona(s) is you’ll gain insight on where and how they seek information. Are there certain blogs they subscribe to? What websites do they go to for information? Are there specific keywords they’re using in Google searches? Knowing where your buyer persona is hanging out online makes it much easier to get your website in front of them.
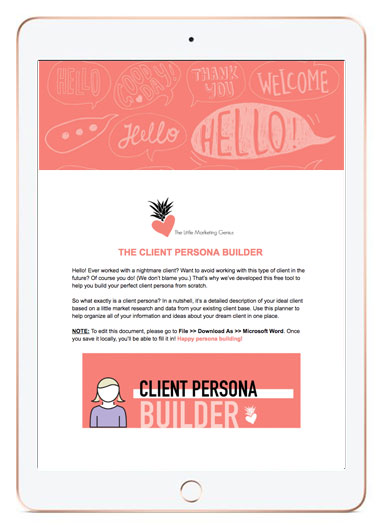
CREATE THE PROFILE OF YOUR DREAM CLIENT USING OUR FREE CLIENT PERSONA BUILDER!
Once you know exactly what your dream client looks like, you’ll never make the mistake of taking on (or marketing to) a nightmare client again. Download our FREE Client Persona Builder tool today.
3. Perform keyword research.
If you want your website to have a chance of ranking in Google search results, then you need to do a little keyword research. Researching ideas for keywords is not rocket science either! You can get ideas from current customers or clients by simply asking them how they’d search for topics related to your business on Google.
You can also perform a little brainstorming session of your own. Open up a blank Word or Google doc and start typing as many search words or phrases you can think of as it relates to your business. After you have your list, start plugging your ideas into the Google search box. When you do this, you’ll notice at the bottom of the results page there is a list of other related searches. Add these to your list as well.
With your keywords plotted out, you can now craft your copywriting for SEO!
Read HubSpot’s Tips for Keyword Optimizing the Most Critical Parts of Your Website

4. Start blogging.
Blogging is a great way to get your small business found on Google. Each time you publish a new blog post, you’re adding a new page to your website that will eventually be indexed. This equates to more opportunities for you to show up in search results!
Your blog should provide value to your target buyer persona by answering their questions and offering up solutions. It should be educational … not sales-y.
A blog is the perfect way to showcase and share your industry knowledge with your audience. When you develop interesting and informative content based on your own expertise and experience it not only positions you as a thought leader, but also creates a fantastic opportunity to share something with your social networks.
Pro Tip! Consider guest blogging on a blog that your buyer personas like to frequent!
Download our free step-by-step guide to blogging!
Implement these four strategies and watch as organic traffic to your website begins to increase. Remember, content is king. Keep those visitors wanting to come back for more!

How To Start A Business Blog
Starting a business blog might seem like a daunting task but we’re here to assure you it isn’t. Today we’ll explain the importance of having a blog and then outline a basic roadmap for getting started.

Starting a business blog might seem like a daunting task but we’re here to assure you it isn’t. Today we’ll explain the importance of having a blog and then outline a basic roadmap for getting started.
Why You Should Have A Business Blog
A blog will help generate traffic to your website. If you’re optimizing your posts for search engines, overtime, they will begin to rank in search results. Blog posts also serve as great content for social media! If your topics are interesting enough, you can expect to see clicks to your website as well as shares.
Step-by-Step Guide For Starting Your Business Blog
1. Research your audience.
A business blog differs from a personal blog in that it focuses on a specific niche and audience. In order to craft blog posts that will draw in your target audience, you first need to identify exactly who your target audience is.
“If you have worked with your company for a long time, you may feel like you have a good grasp on who your customer is, but it still helps to actually put those ideas to paper. Are the majority of your customers male or female? Where do they live? What do they do for a living? What are their buying habits? What are their needs and challenges? What questions do they ask?”
By gaining a deep understanding of your target audience, it will be easier to develop content that truly interests them. Through this process, you’ll also learn what style your messaging should be delivered in and where you audience goes to seek information.
GET Jamie & Katie’s FREE Guide To Blogging!
2. Plot out your keywords.
In order to get found in Google searches, the content on your website and blog needs to reflect what potential site visitors are actually searching for. Make a list of as many long-tail and short-tail keywords as possible.
A long-tail keyword contains three or more words (i.e. chocolate wedding cupcakes Middletown). A short-tail keywords are typically under three words and essentially more broad in nature (i.e. chocolate cupcakes). You’ll want to include a healthy mix of both throughout your website and blog.
“Naturally, short term keywords are bound to give your website more hits since they are less specific. These short tail keywords are able to capture a bigger share of your target market. However, long tail keywords are more about giving quality hits than a large number of traffic. Targeting short tail keywords, however makes yielding positive results difficult and are often time consuming and expensive.”
(Quora)
3. Create an editorial calendar.
Once you’ve developed a list of keywords, coming up with topics to write about will be a breeze. If you’re still left feeling stumped, you can read our post, “3 Ways To Come Up With Blog Post Topics.”
We like to use an editorial calendar so we can tie our blog posts into our other marketing efforts such as social media campaigns and paid Google ads. By planning out our posts in advance, we can easily build other content around each topic and avoid the headaches associated with scrambling for new ideas each week. It’s all about being prepared!
4. Devise a plan for CTAs.
If you’ve enticed a visitor to read a blog post, don’t miss the opportunity to engage them even more! Include a call-to-action that fits the context of each post. Let the reader know what action you’d like them to take next. If you published a post about The Benefits Of Hot Yoga, offer them a Beginner’s Guide To Yoga Poses or a coupon to try a free class. The idea is to keep the visitor active on your website for as long as possible.
5. Track your success.
Whatever platform you use to host your blog, make sure you’re getting the most out of it. Regularly analyze the traffic and CTA clicks for each post so you can see how it stacks up against the rest. Having these insights will allow you to better leverage your hot topics in the future!
6. Share your posts with the world!
Put your social media sites to work and be sure to share each and every blog post with your networks! Include an inspiring image that relates to the post (along with the link) and encourage your followers to share. This will help drive traffic to your blog and hopefully score you new subscribers!
Ready to master the art of blogging?


Small Business Website Design Packages
Take a look at your website. Do you love what you see? Do your visitors love what they see? Think of your website as another face of your company. If it doesn’t represent your style and brand then it’s time for a change.
The Little Marketing Genius is now accepting new 2019 website clients!

Take a look at your website. Do you love what you see? Do your visitors love what they see? Think of your website as another face of your company. If it doesn’t represent your style and brand then it’s time for a change.

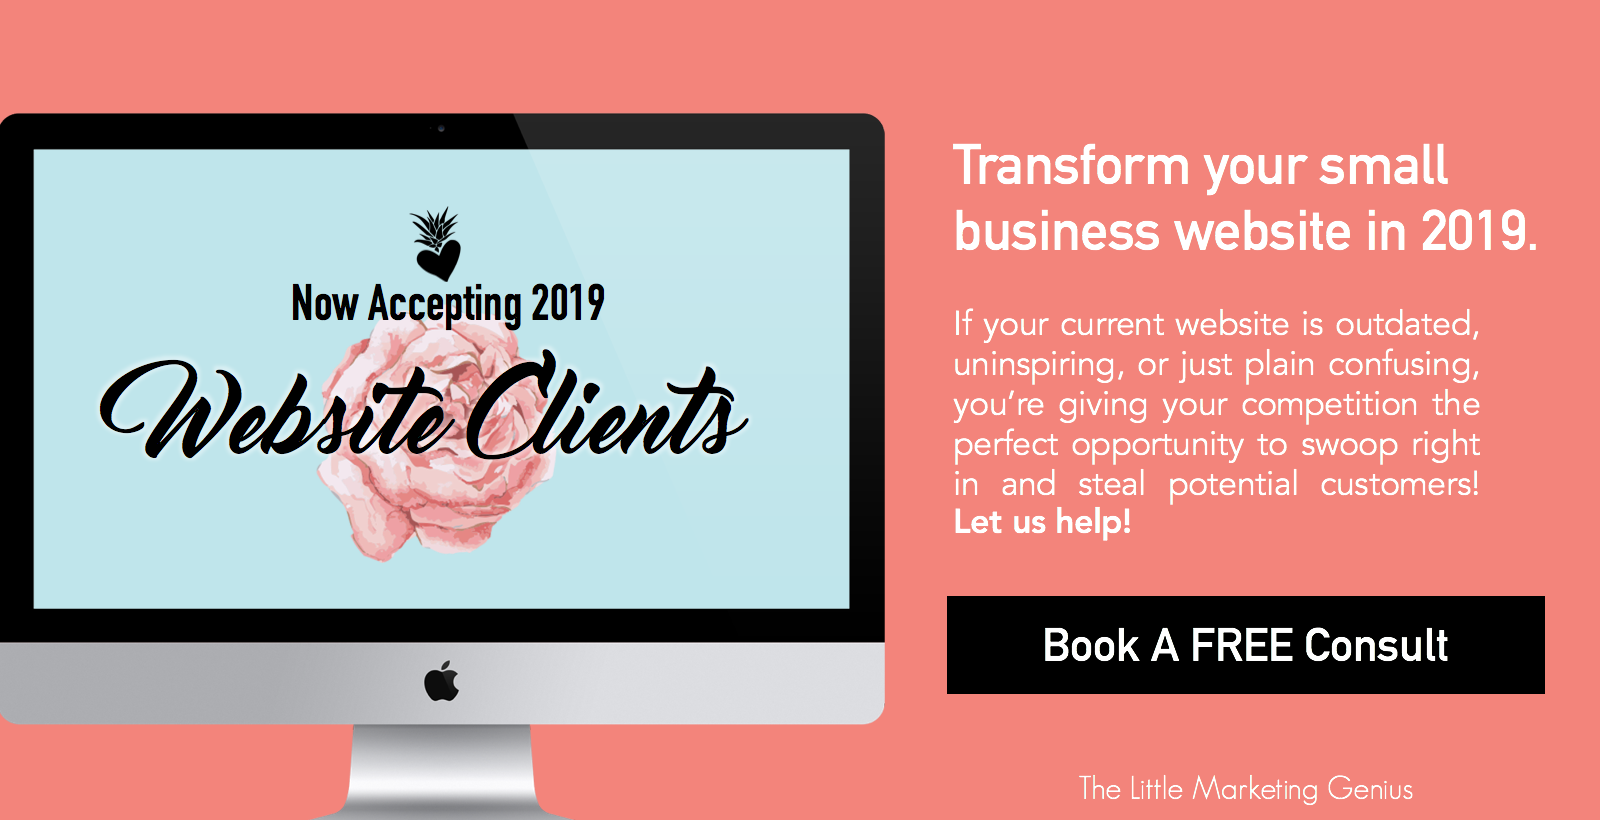
We’re Now Accepting 2019 Website Clients
If your small business website isn’t where you want it to be, make 2019 the year you invest in transforming it. It will be worth every penny … that, we can promise you. We’ll collaborate with you to ensure your new website accurately and professionally reflects your small business. Using eye-catching imagery, clean white space, and creative copywriting, we’ll bring life to your brand online. And we’ll help you incorporate lead generation tools that will work for you 24/7.
Getting a visitor to your website is a big enough challenge. Keeping them active and engaged once they’re there … well, that’s a whole different story! However, with a balanced mix of great content, seamless functionality, and enticing CTAs, it’s absolutely possible. And together, we can make it happen.
If your current website is outdated, uninspiring, or just plain confusing, you’re giving your competition the perfect opportunity to swoop right in and steal potential customers. Let us help!
The Process
Working with us is not the typical agency experience. We’re focused on small business owners who find value in professional marketing. We’ll get to know you and your business so we can build a site that’s perfect for you.
It all begins with a FREE 15-minute consultation. We’ll take a look at your current site and together we can begin the process for making it so much better. From there, we’ll:
Create or update your brand image if needed
Determine the design and functionality elements that you want
Plot out keywords that will help your site rank in search results
Strategize how and where call-to-action buttons will be used
Develop a plan for blogging if desired
Make recommendations for opt-in gifts or downloadable content
Construct a project plan
Build and launch your dream website!
We offer solutions that fit your needs.
The Packages
Just like every small business, each small business website is unique! We offer two different packages based on what you’re looking to accomplish. Purely Pineapple (a maximum of six pages) is our most basic package. Need branding and copywriting, too? Our The Pina Colada is the package for you.
NOTE: If you pay in full for either of these two packages, you’ll receive a 5% discount! For up-to-date pricing, please visit our Web Design page.
If you need something that’s not included in one of our two packages, take us up on a free 15-minute consult so we can gather the information we need to prepare a custom proposal for you.
Is working with The Little Marketing Genius right for me?
We understand. A website is a big investment for a small business … and one that should be taken seriously. So how would you answer these questions?
Do you place great value on having a beautiful website that your visitors will love?
Are you willing/able to invest at least $2,000 for the project?
Would you make it a priority to submit feedback and/or necessary content that we need from you while designing your website?
Are you excited to get this party started?
If you answered Yes to all four of these questions then, YES … we’ll make a perfect fit!
Don’t let another minute pass of being dissatisfied with your website. Book your free consult with us today!

From The Mouths Of Smiling Customers: 4 Creative Ways To Repurpose Your Reviews
People trust their peers more than they trust marketers. That’s why it’s incredibly wise to try and leverage any glowing reviews you receive from happy customers or clients. How can you go about doing this? Let’s jump right in!

It’s quite literally one of the best feelings ever. That moment when you receive a notification from Google stating that someone left you a 5-star review. I don’t know about you but whenever I see one of these, I immediately stop what I’m doing to go check it out. Seriously. I can barely contain myself in these moments.
Reviews … either positive or negative ... can seriously impact your business. Why? Because people trust their peers more than they trust marketers! Forbes research showed that “81% of consumers’ purchasing decisions are influenced by their friends’ social media posts.”
And according to Harvard Business Review, “84% of B2B buyers are now starting the purchasing process with a referral, and peer recommendations are influencing more than 90% of all B2B buying decisions.”
People trust their peers more than they trust marketers. That’s why it’s incredibly wise to try and leverage any glowing reviews you receive from happy customers or clients. How can you go about doing this? Let’s jump right in!
1. Create a graphic for social media.
Research has proven that social media plays a significant role in the buyer’s journey. Social Media Today sheds some additional light on this trend:
“There is safety in numbers. Human beings in general have a crowd mentality. This phenomenon is behind trends and fashions because people opt to move together in large groups. Thus, it is easy to sway them when they are in groups. This is why social media has become a hit when it comes to marketing. People will largely be convinced to make a buying decision if their peers have already done so. All you need to do is to demonstrate to them how the same product has benefited their peers and friends.”
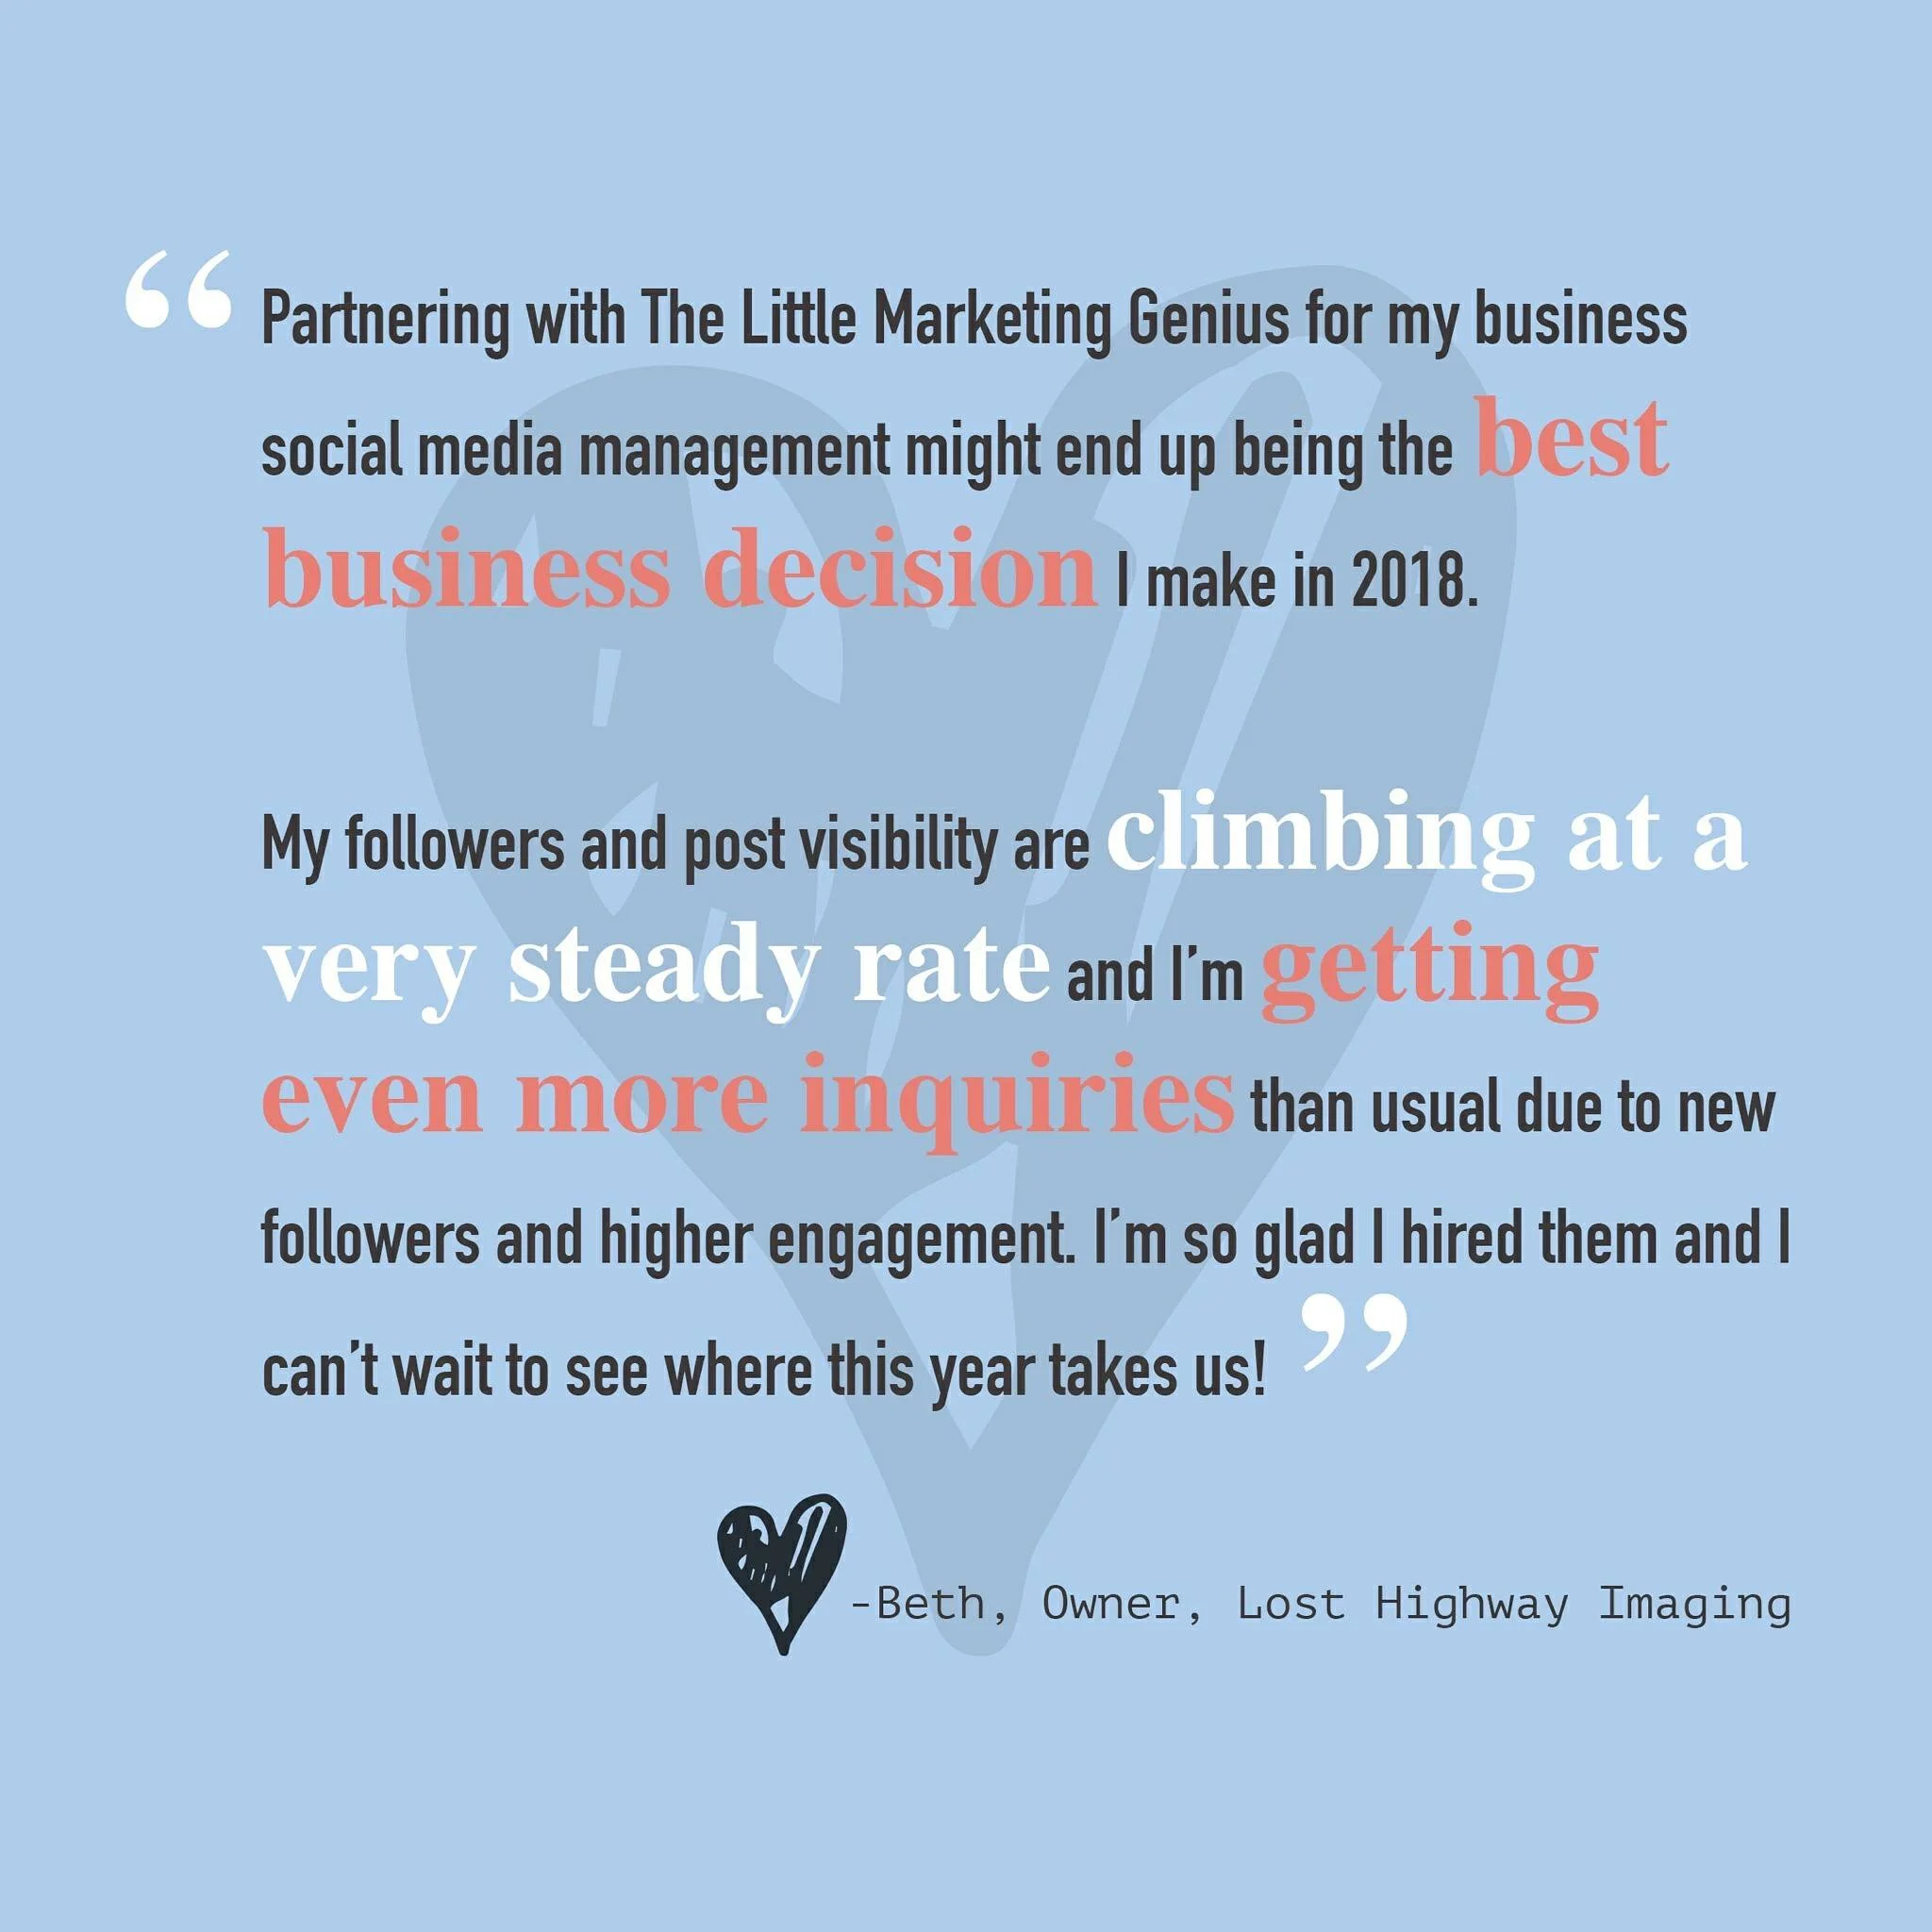
Touting positive reviews in a creative way on social media can pay dividends. By using a platform like Canva, you can quickly and easily overlay text on top of a graphic. Pull little excerpts from your favorite reviews, make them visually appealing, tag the reviewer (with their permission), and post away. It’s as simple as that! Here’s an example of a graphic we created from a Google Review left by one of our favorite clients!
2. Feature your favs in your IG Story.
We love Instagram Stories for many reasons. One reason being we can showcase client reviews there in a really fun way! To see how we do this, simply visit our Instagram (@thelittlemarketinggenius) and click on the Reviews highlight!
Pro Tip: If you can persuade any of your customers to do a short video shout-out, you can upload it to your IG Story for maximum impact
3. Create a Reviews page on your website.
Your customers can essentially post reviews about you in a number of different places … Google, Facebook, Yelp, Trip Advisor … the list goes on. So why not organize the best of these reviews onto a single page on your website? Potential clients love to hear about the successes of other clients. A Testimonials or Reviews page is a great way to showcase all of the kudos you’ve already received. See how we’ve set up our Testimonial Page here.
4. Showcase a blurb in your newsletter.
If you email a regular newsletter to your subscribers, first off, you get a gold star! A newsletter is a great way to stay in front of your audience by sharing current info, events, and specials that pertain to your business. In your next newsletter, reserve a small section to include a blurb from a recent customer review or testimonial. It never hurts to remind your subscribers that you’re awesome (according to your clients).
Repurposing positive reviews and testimonials can pique the interest of future customers. Don’t be shy … use these to your advantage! If you have other creative ways of highlighting past reviews, share them with us in the comments!

6 Elements Of A Good Homepage
Does your homepage provide fast answers or does it leave visitors feeling lost or confused? In this blog post, we’ll share six elements of a good homepage. Apply these to your site and you’re bound to see improvements in page traffic and bounce rates!

You only have ONE chance to make a good first impression. That’s why your small business website must immediately grab the attention of your visitors and pull them in. The fact of the matter is, when it comes to browsing the Internet, people tend to have very short attention spans. They’re looking for answers and information and the expectation is, they’re going to find it quickly.
Does your homepage provide fast answers or does it leave visitors feeling lost or confused? In this blog post, we’ll share six elements of a good homepage. Apply these to your site and you’re bound to see improvements in page traffic and bounce rates!
Element #1: A Clear & Compelling Value Proposition
A value proposition is “a positioning statement that explains what benefit you provide for who and how you do it uniquely well. It describes your target buyer, the problem you solve, and why you’re distinctly better than the alternatives.” (Forbes)
Your homepage needs to quickly and concisely relay what your value proposition is to incoming visitors. If people are left feeling any doubt as to what your business does or how you can help them, they’re going to move right on along to someone else.
Element #2: Contact Information
If someone likes what they see on your homepage, don’t make them go searching for your contact information. Visitors should be able to quickly and easily reach out to you if they so choose. Your business address (if you have a physical location), phone number, and/or email can neatly be placed within the footer of your homepage so it’s not obtrusive yet easy enough to find if needed.
Element #3: Inspiring Photography
One of our biggest pet peeves is seeing low resolution imagery being featured on a homepage (or on any area of a website, for that matter). Original, high-quality photography that showcases what your brand is all about is absolutely the way to go! Do not skimp out. The visuals on your site will captivate your visitors well before the text ever will. If you don’t have beautiful photos to work with, consider investing in a branding photo shoot in 2019!
Check out photos from the branding shoot we did this past summer!

Photo By Audra Nicole Photography
Element #4: Easy-To-Use Navigation
Don’t frustrate your visitors with clunky navigation! Remember, people tend to have short attention spans when browsing online. Allow your visitors to quickly and easily access the information they came looking for. Your navigation should be kept as short and sweet as possible, highlighting the most popular areas of your site. If you utilize sub-menus, they should be organized, intuitive, and easy to explore.
Element #5: A Link To Your Blog
Your business blog should serve as a powerful resource. It’s a place for you to share knowledge and unique insights about your industry. So don’t bury this treasure in the depths of your website! Provide visitors with fast access to your blog by including a prominent link to it on your homepage.
Need some help starting a new business blog? Check out these three blog posts:
Element #6: A Call-To-Action (CTA)
Visitors to your website should have a clear understanding of what action(s) you’d like them to take. Remember, your website (and especially, your homepage), is working for you around the clock. It can collect great new leads if you give it the tools to do so. Incorporating a call-to-action such as “Subscribe To Our Blog” or “Book A Free Consult” will allow interested visitors to take the next step toward doing business with you.
For more on incorporating CTAs on your website, read our blog post, 4 Easy Ways To Capture Leads On Your Website.
Drawing website visitors deeper into your brand starts with an awesome homepage. We’d love to help transform your website into a beautiful and inspiring place that people keep coming back to. Book a free 15-minute consultation with us today!